7 Things You Need to Know About Continual Service Improvement
Tag Archives: Tips
Authenticator
Microsoft to rid Authenticator of password management
Microsoft will end support for password management in its Authenticator app at the end of July as part of a broader move toward passwordless authentication methods such as passkeys and FIDO2. Microsoft suggests users who continue to use passwords to use dedicated password managers such as Microsoft Edge or Google Password Manager.
Full Story: The Hacker News (India) (7/1)

SolarWinds Backdoor
What They’re Not Telling You About SolarWinds: It Wasn’t a Breach — It Was the Backdoor
In December 2020, the world was told a Russian “Hack” hit U.S. federal networks through SolarWinds.
Wrong.
It wasn’t a foreign op.
It was a white hat takeover of the digital command grid.
Let me show you.
1. What Was SolarWinds?
A Texas-based IT company that pushed software updates to:
- Pentagon
- DHS
- State Department
- Treasury
- NSA
- Big Tech (Microsoft, Cisco)
- Even Dominion Voting Systems
- The update included a hidden “Sunburst” backdoor.
What they called a vulnerability…
…was actually a legal foothold.
2. EO 13848 Was Already Active
Trump had already signed Executive Order 13848 in 2018:
Declaring election interference a national emergency.
By 2020, SolarWinds gave federal intel teams lawful access to:
- Servers
- Email traffic
- Internal communications
- Contract records
- Voting infrastructure
Under 13848, they didn’t need permission.
They needed access.
SolarWinds was access.
3. What Came Next?
- 2021: Microsoft, FireEye, and CISA all “confirm breach”
- 2021–2022: Mass resignations in Big Tech, banking, and military
- 2022–2023: SCOTUS shadow docket rulings + Roe overturned
- 2023–2024: NGO purges, media collapses, asset seizures escalate
- 2025: One Big Beautiful Bill → AI firewall codified
You’re watching a multi-year digital sting operation unfold in quarters.
4. SolarWinds + EO 13961 = Continuity Killbox
EO 13961 (Mission Continuity Strategy, Dec 2020):
Federalizes critical mission systems across all agencies.
Now link the pieces:
- SolarWinds → digital access
- EO 13848 → legal seizure authority
- EO 13961 → control continuity
- 2025 AI Clause → shields enforcement from state interference
This isn’t cleanup. It’s activation.
5. The Real Operation
SolarWinds wasn’t a failure.
It was the launchpad for:
- Asset tracing
- Intel extraction
- Sting AI deployment
- Legal lockdown of Deep State infrastructure
Total ops handoff to Continuity teams (Guard/Marines/Coast Guard)
The Great Reset isn’t theirs.
It’s ours.
Bottom Line:
- SolarWinds was the moment they got the keys.
- Every laptop seized…
- Every NGO collapsed…
- Every offshore trust exposed…
- It all ties back to December 2020.
- And now in July 2025, they’ve made it permanent.
The New Edit
The classic MS-DOS Editor is now cross-platform
If you remember Bill Gates as CEO of Microsoft, you might remember the MS-DOS Editor, which, when introduced in 1991, was revolutionary in the early days of GUI-based computing. Microsoft recently modernized it in an open-source tool called Edit, built with Rust, and which works on macOS and Linux systems as well as Windows.
Full Story: Ars Technica (6/23)
Windows Terminal

| Want to quickly open Windows Terminal? |
| If you need to use the command line, you can type wt into search or right click Start and select Terminal in the menu. Holding Shift + CTRL when you press enter will launch Windows Terminal as admin. |
| Learn what you can do with Windows Terminal ❯ |
Windows Terminal is a modern host application for the command-line shells you already love, like Command Prompt, PowerShell, and bash (via Windows Subsystem for Linux (WSL)). Its main features include multiple tabs, panes, Unicode and UTF-8 character support, a GPU accelerated text rendering engine, and the ability to create your own themes and customize text, colors, backgrounds, and shortcuts.
WIFI password
Recovering a WIFI password.
You need to be logged in to get to the password information.
To access the control panel network connections use the ncpa.cpl tool by selecting the Windows +r keys, type in the “ncpa.cpl” and select run.
Ncpa.cpl is a file associated with the Network Connections control panel in Windows, which allows users to manage network adapters and settings.468 It can be accessed by typing “ncpa.cpl” in the Run dialog box (Windows + R) or by navigating to the Control Panel and opening Network Connections.46 The file is safe and should not be considered a threat to your computer.2
The acronym “NCPA” stands for Network Connections Properties and Adapters.3 This tool is particularly useful for network administrators and users who frequently need to adjust network settings.

Right Click the desired Wireless Network connection from the list.
Select Status from the dropdown list.

Select Wireless Properties

On the “Wireless Network Properties” open the Security tab

On the Security tab, select “Show characters”.

Have fun!

Microsoft Teams Meetings
Join a meeting in Microsoft Teams
Join Teams meetings anytime, anywhere, from any device. For the best experience, join from the Teams desktop or mobile apps.
If you’re having trouble joining a Teams meeting, try these tips: I can’t join a Teams meeting.
In this article
- Join by link
- Dial in or out by phone
- Join a meeting organized by a Teams personal account user
- Join anonymously or from a different account
- Join from calendar or ID
- Connect to a room while you join
- Join in a channel
- Edit your display name
- Join from chat
- Join a meeting as an avatar
Join by link
In your meeting invite, select Join the meeting now to join on Teams for web or desktop.
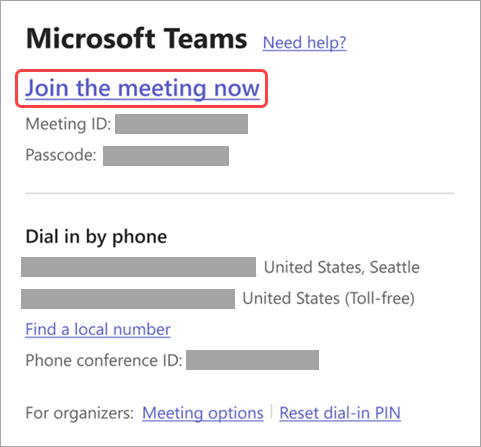
If you already have the Teams app, the meeting will open there automatically.
- If you don’t have a Teams account and the organizer has allowed it, you can enter your name to join the meeting.
- If you have a Teams account, select Sign in to join with access to the meeting chat and more. You’ll then join the meeting right away or enter the lobby until an organizer admits you.
Join a meeting organized by a Teams personal account user
Use your Teams account to attend a meeting set by a Teams personal account user. You can join from your Teams calendar. If someone sends you a meeting invite in Chat, select the link and select Join now.
- In Teams, select Calendar
to see your meetings.
- Find the meeting you want to attend and select Join.
You’re not required to switch between Teams personal use and Teams (work or school).
If you join a meeting on Teams for personal use, you’ll join the meeting with your personal Teams account. The Microsoft Privacy Statement governs data for meetings with personal Teams accounts.
Note: Some meeting features may be unavailable for Teams personal accounts. Learn more about meeting experiences for Microsoft Teams Free participants.
Join from calendar or ID
- Select Calendar
- Find the meeting you want and select Join.
Join with a meeting ID from your Teams app
- Select Calendar
- Select Join with an ID.
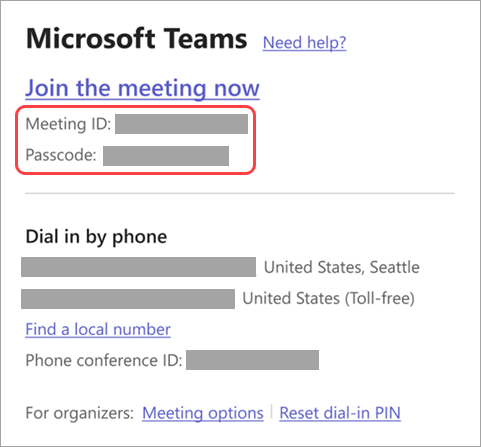
- Enter a meeting ID and passcode. You can find the meeting ID and passcode:
- In the meeting details from your Teams calendar. Select Details > Show meeting info.
- At the bottom of your Teams meeting invite email.
3. Select Join meeting to join the meeting as a participant.
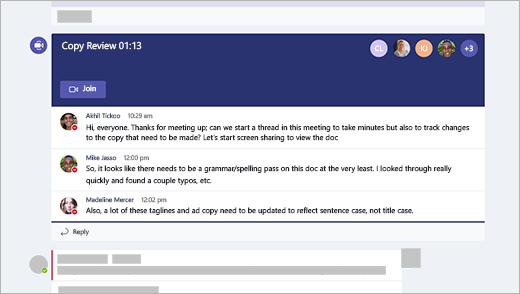
Join in a channel
If a meeting takes place in a channel, you’ll see an invitation to join, relevant content, and who’s in the meeting right in the channel. Just select Join .
Join from chat
To start or join an instant meeting from a group chat:
- Open the group chat you want to start an instant meeting in.
- At the top of the chat, select Meet now.
- If an instant meeting starts in a group chat, you’ll be able to see see from the chat list that a meeting has started.
- You can open the group chat and select Join to enter the meeting.
- Select the live indicator at the top of the group chat to view participants.
- Select Ring others to join to notify others in the group chat about the instant meeting.
- Select Leave from your call window to leave the meeting.

To learn more, see Start an instant meeting in Microsoft Teams.
Dial in or out by phone
Dial in or out to join a Teams meeting with your phone or invite someone else by calling their phone. If you see a phone number and conference ID in your meeting invite, dialing into the meeting is available. To learn more, see Join a Teams meeting by phone.
Note: If you can’t find a phone number in the meeting invite, contact your IT admin.
To dial out to your phone to join a meeting:
- Select Calendar
- Select a meeting.
- Select Join.
- Select more join options from the pre-join screen.
- Select Call me.
- Enter the phone number you want to be called from and select Call me.
- When you answer the call, say “OK” or press 1 to join, depending on org settings.
- Hang up or select Disconnect in the meeting window to end your phone call.
To dial out to another person’s phone during a meeting:
- Select People
in your meeting controls.
- Add their phone number in Invite someone or dial a number.
- Select Add phone.
The person will be called and will need to say “OK” or press 1 to join the meeting, depending on org settings.
Join anonymously or from a different account
To join a Teams meeting with a different account:
- Select the meeting in your Teams calendar.
- Select Join.
- Select Change at the top of the meeting pre-join screen.
- Select the account you want to join the meeting with.
- If you don’t see the account you want to join from, select Add another account. Then, add an existing account, or select Create or use another account to create or sign into a new one.
- Select Join to enter the meeting.
To join a Teams meeting anonymously:
- Select the meeting in your Teams calendar.
- Select Join.
- Select Change at the top of the meeting pre-join screen.
- Select Join without signing in.
- Type your name in at the top of the pre-join screen.
- Select Join to enter the meeting.
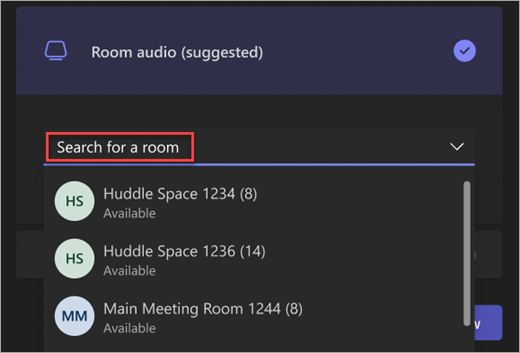
Connect to a room while you join
Before you join a Teams meeting, you can connect to a meeting room and use its audio and video devices.
To connect to a room:
- Join your meeting. Before you enter, wait for a room to be detected.Important: Enable Bluetooth on your device to detect rooms nearby.
- Select Room audio and confirm the room you want to connect to.
Note: Select X to close a suggested room and search for a different one. Rooms with the Cast icon
are in close proximity.
- Select Join now.
Edit your display name
Note: Editing your display name is available as part of the public preview program and might undergo further changes before being released publicly. To get access to this and other upcoming features, switch to Teams public preview.
Customize your presence during a Teams meeting by editing your display name.
To change your name:
- Select People
- In the Participants pane, hover over your name and select More options
> Edit display name.
- Enter a name and select Save.
Your edited name will remain throughout the duration of the meeting.
Join a meeting as an avatar
You can join any Teams meeting as a personalized avatar by following the instructions here .
Join a meeting without an account in Microsoft Teams
You can join a Teams meeting anytime, from any device, without signing into a Teams account.
If you’re having trouble joining a Teams meeting, try I can’t join a Teams meeting.
Important: For some meetings, admin settings prevent unverified people from joining the meeting. Depending on the meeting, you may have to enter a one-time passcode sent to your email or create a Teams account.DesktopMobile
Join the meeting before it starts to test your setup from the pre-join screen. From there, you can enter the meeting up to 15 minutes before its start time to troubleshoot or see how Teams works. Meeting participants and organizers will be notified when you enter the meeting.
To join a Teams meeting without signing into an account:
- Open the meeting invite and select the link next to Join or Click here to join the meeting.
- When prompted, select Continue on this browser or Join on the Teams app. You don’t need to install the Teams app to join the meeting.
- You can join Teams for web on Microsoft Edge or Google Chrome. You may be prompted to give Teams access to your mic and camera. When you select Allow, you can always turn off your mic and camera once you join the meeting.
- Select Join now.
- In meetings where admin settings prevent unverified people from joining, you’ll be prompted to enter your email address. Enter your email address and select Next. Enter your password if you already have a Microsoft account or select Send code and enter the one-time passcode sent to your email if you don’t have an account. Once verified, select Join now.
Note: People who are signed in will have access to more meeting features than those who aren’t signed in.
If you enter the meeting lobby, wait for someone in the meeting to admit you. If no one admits you within 30 minutes, you’ll be removed from the lobby. If that happens, you can try rejoining.
Depending on how you joined the meeting, other participants will see a label next to your name. If you joined:
- without entering your email address, everyone will see Unverified next to your name.
- using a one-time code sent to your email, everyone will see Email verified next to your name.
- with your Microsoft account, everyone will see External next to your name.
Organizer’s view
If you’re the meeting organizer, we’ll alert you when someone is waiting in the lobby.
Select Admit to let them right into the meeting, or View lobby to see a list of everyone in the lobby and admit or deny them.
Note: Anyone who doesn’t have a Teams account and joins the meeting without entering a one-time passcode sent to their email will be labeled Unverified. Anyone who doesn’t have a Teams account and joins the meeting after entering a one-time passcode sent to their email will be labeled Email verified. To learn more about people with guest access, see Work with external guests.
I can’t join a meeting in Microsoft Teams
If you can’t immediately join a Teams meeting, there are several possible reasons:
- You’re waiting in the lobby: Some organizers might place attendees in a lobby before admitting them into the meeting. Wait for someone to admit you, or reach out to the organizer directly to be let in.
- Your internet browser isn’t supported: Teams doesn’t currently support Safari for Mac. If you’re joining a Teams meeting from the web, try joining from Microsoft Edge, Google Chrome, or other supported browsers.
- Your internet connectivity is low: If your internet connection is low, you may not be able to join a Teams meeting right away. Try waiting for your connection to improve, joining from your supported mobile device, or reaching out to your internet provider.
- Security policies for the meeting are preventing you from joining: If a meeting organizer enables end-to-end encryption for a meeting, you might have limited access to join. Try reaching out to the organizer to be let in.
In Teams, you might receive a message about why you’re unable to enter a meeting. Here are the different messages you might encounter and how to resolve them.
“Sign in to join this meeting”
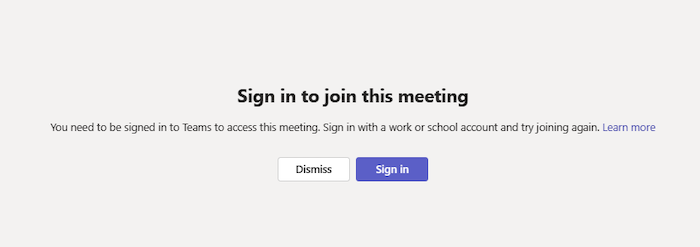
If you see this message, the meeting doesn’t allow people to join unless they’re signed in with a Teams work or school account. You might need to take extra steps to join:
- If you’re joining from a meeting link or as an anonymous user, make sure you’re signed into your Teams work or school account.
- If you’re the meeting organizer and want people to be able to join your meeting without signing in, contact your IT admin (learn more here). Changes from your IT admin may take up to 24 hours to take effect.
“Sign in with a different account to join this meeting”

If you see this message, the policies set by your or the meeting organizer’s org prevent you from accessing the meeting. You might need to take extra steps to join:
- Make sure you’re signed into the account the invite was originally sent to.
- If you’re the meeting organizer and you want to allow people from other orgs to join your meeting, contact your IT admin (learn more here). Changes from your IT admin may take up to 24 hours to take effect.
“This meeting is locked.”

After a meeting starts, organizers can lock the meeting to prevent new participants from entering.
Reach out to the meeting organizer to let them know you’re having trouble joining. If they unlock it, you can try joining again.
“Your organizational policy does not allow you to join this meeting”
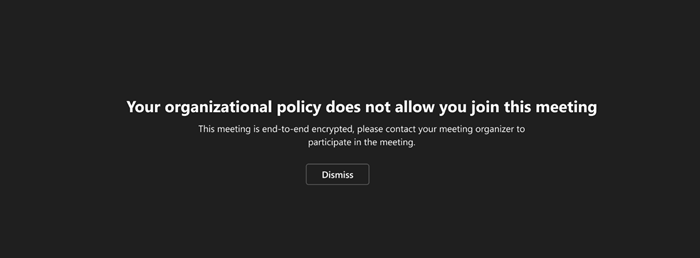
You can’t join because the organizer has enabled end-to-end encryption for their meeting. Contact the organizer to let them know you’re having trouble joining.
“The meeting lobby is full right now.”

If the lobby is full, wait a few minutes before trying to join again. You may be able to enter if other attendees join the meeting or leave the lobby. For more on lobby settings, see Using the lobby in Teams meetings.
“Sorry, no one has responded to your request to join.”

If you get this message after 30 minutes of waiting, your request has timed out.
- Check to make sure you’re joining from the correct meeting link and try again.
- Reach out to the meeting organizer to make sure your request is seen.
Start an instant meeting in Microsoft Teams
If you don’t have meeting scheduling capability in Outlook or Teams, starting an instant meeting is a great option. Just like with scheduled meetings, everyone who attends your meeting will continue to have access to the meeting chat, the recording, and anything else people share in the meeting (like files and meeting notes), even after the meeting ends.
There are a couple of different ways to get an impromptu meeting going with just a few clicks.
From your calendar
- Go to Calendar
on the left side of Teams, then select Meet now
in the upper right corner.
- Edit the Meeting name and select Get a link to share to share a link to the meeting.
- If you select Get a link to share, you’ll have the option to select Configure meeting options, where you can change meeting options.
- When you’re ready, select Start meeting to open the meeting pre-join screen.
- Select Join now to enter the meeting.
In a channel
To start an instant channel meeting:
- Choose the channel you want to meet in from your chat and channels list.
- In the Posts tab, look for Meet
in the top-right corner.
- From the drop-down menu, select Meet now.
- To keep the context of a specific conversation, choose Reply below any post, then Meet now
- To keep the context of a specific conversation, choose Reply below any post, then Meet now
- Select Join now to enter the meeting.
From a group chat
Instant meetings in group chats are a way to meet with members of a chat spontaneously, without disrupting or ringing others. Group chat meetings are also a way to make sure meeting recordings and messages all stay in the same place.
To start an instant meeting from a group chat:
- Open the group chat you want to start an instant meeting in.
- At the top of the chat, select Meet now
- After you start an instant meeting in a group chat, others will see from their chat list that a meeting has started in that group chat.
- They can open the group chat and select Join to enter the meeting.
- Select the live indicator at the top of the group chat to view participants.
- Select Ring others to join to notify others in the group chat about the instant meeting.
- To ring individual people, select their names and select Ring.
- To ring everyone who isn’t in the instant meeting, select Ring all.
- Select Leave from your call window to leave the instant meeting.Note: If you’re not the last person to leave an instant meeting, you can rejoin by opening the group chat and selecting Join. When the last person leaves the meeting, everyone will be notified that the meeting has ended.
From chat using commands
Start an instant meeting in any chat using commands.
To start an instant chat meeting:
- Open the chat conversation you want to start an instant meeting in.
- Type /meetnow in the compose box.
- Press the Enter or Tab key on your keyboard.
To learn more, see Use commands in Microsoft Teams.
Invite people
After you join the meeting, you’ll see a prompt to invite others.
- Select Copy meeting link
to copy and share a link to the meeting that others can click to join.
- Select Add participants to open People
- Select Share via default email to launch your default email app with an automatically generated email invite. Enter recipients and send the email to invite them.
You can always add people later by selecting People in your meeting controls. Select Share invite to notify others about your meeting via link or email.
To rejoin the same meeting anytime, find the meeting chat in your chat list and select Join.
password or phrase
Best Passphrase Use
A passphrase is best used to enhance security by providing a longer and more memorable alternative to traditional passwords. Passphrases are typically longer than passwords, often consisting of four or more words, which makes them harder to crack through brute force attacks. They are easier to remember than random strings of characters, reducing the likelihood that users will write them down or use simple, easily guessed phrases.
To create a strong passphrase, follow these guidelines:
- Use at least four words, each with four or more letters.
- Include spaces between words to increase complexity.
- Consider using a mix of uppercase and lowercase letters, numbers, and special characters to add complexity.
- Avoid common phrases, song lyrics, or easily guessed sequences.
- Use a passphrase generator or a method like diceware to ensure randomness (in my view not recommended as you could leave a trace of the phrase online).
- Store your passphrases securely using a password manager.
For example, a passphrase like “flew cat book through there!” is easier to remember and harder to crack than a complex password like “p%9y#k&yFm?”.
Using a passphrase can significantly improve security, especially when combined with multi-factor authentication something that we are no longer able to bypass. This combination provides an additional layer of protection, making it even more difficult for unauthorized users to access your accounts.
By following these best practices, you could effectively leverage passphrases to help protect your online accounts and data.

From the table above, you can see that to be safe we need a password of complexity with at least 10 characters, this will give a 5 year safety margin and by that time I presume that the data will be out dated and of little value. This table however does not tell the full story as we move into the next generation of computing, Quantum computing will drastically shorten these times. To ensure we stay relevant, I recommend anything above 13 characters with complexity.
New research
Could handwriting help you remember more?
| In the digital age, it’s easy to default to typing—but research shows that handwriting might be the better choice if you want to retain information. A new neuroscience study reveals that putting pen to paper activates more brain regions and improves memory formation than typing. Whether you’re taking notes in a meeting or jotting down a to-do list, the act of handwriting could give your brain a helpful boost. So, how often do you still write things down by hand? |
This research tells me one thing that I have been saying for decades “use it or loose it”. If we continually use a computer or some smart device we will eventually loose the use of that thing that we call a brain.

In my opinion, I have held to the story, that those that keep using or adding supplements to their diet will loose the function of allowing the body to produce these chemicals and or heal itself due to this lost functionality. It is the same with these devices that we use on a daily basis. We use a digital calculator every time we need to add or manipulate numbers, we are starting to no longer remember telephone numbers as we have a list of contacts on our phones, more and more people have stopped using a keyboard and are verbally interacting with their devices, treating them as friends.
What is this world really coming to? We are heading headlong into a world that is totally alien to what we are used to and will soon be the slaves to a digital world.
New Windows Snipping tool
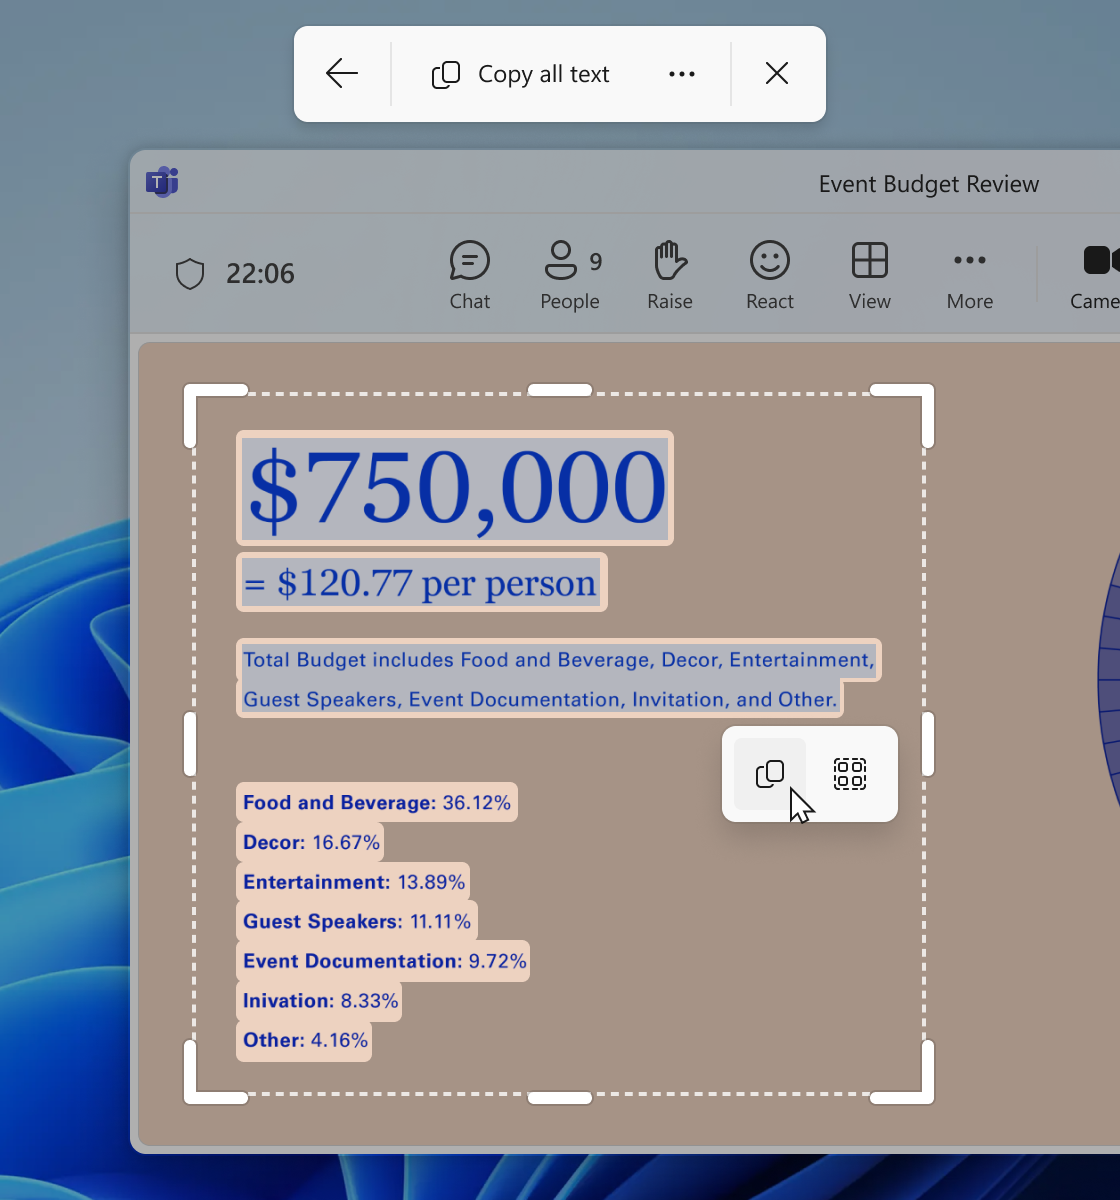
Snipping Tool now has Text Extractor in the capture bar
Microsoft is adding a Text Extractor in the Snipping tool. This feature will soon show on the capture bar and will allow you to copy text to your clipboard without having to take a screenshot of your screen. This update is currently rolling out to Windows Insiders in all channels.
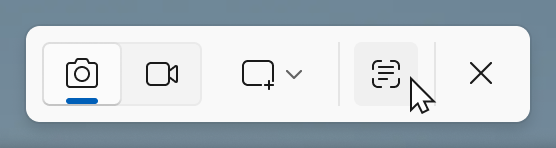
The new Text Extractor
In this update, we are adding text extractor in the Snipping Tool capture bar – designed to minimize the number of steps it takes to copy text to your clipboard without having to take a screenshot of your screen.
To get started, open Snipping Tool via Win + Shift + S or launch the app and click the new “Text Extractor” button in the toolbar.
Select the region you would like to scan for text (just as you would for standard rectangle snip), and you will be able to manually select the text to copy to clipboard, or you can click on the “Copy all text” button in the toolbar to quickly copy all text in the region. You can also explore the “More options” dropdown menu to “Remove line breaks” from copied text or simplify the experience entirely with the “Automatically copy text” selection, which will dismiss Snipping Tool earlier and automatically copy all text in your selection region directly to your clipboard.