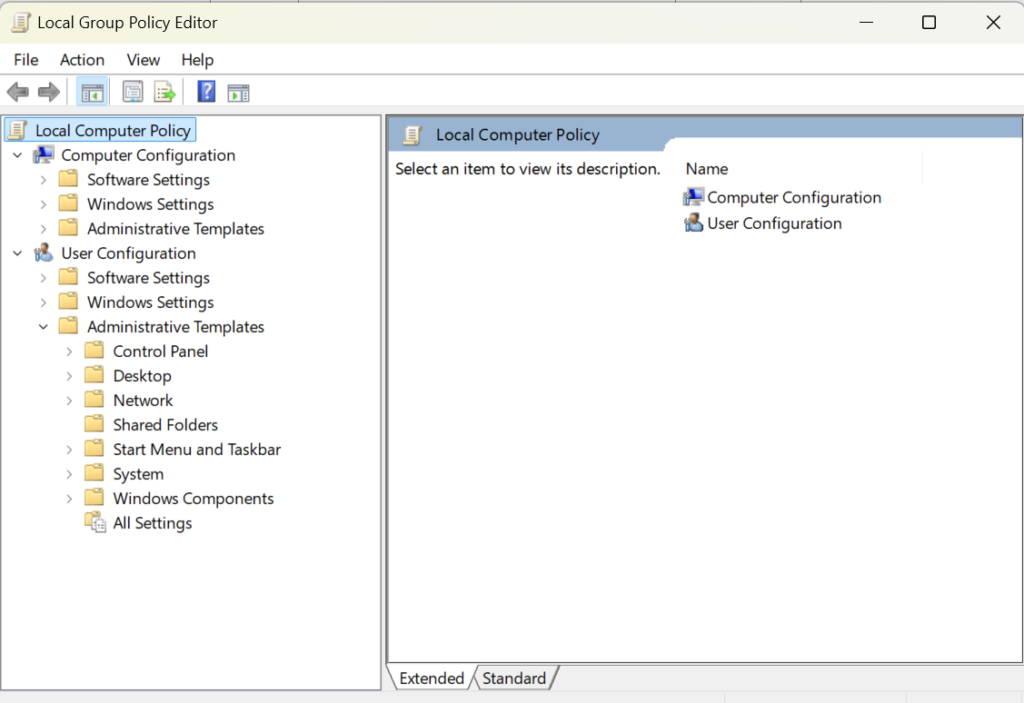
Remove Copilot using the Group Policy Editor, you will need to have Windows 11 Pro, Enterprise, or Education editions. The Group Policy Editor is a tool that allows you to configure various policies and settings for your computer and user accounts. To access the Group Policy Editor, type gpedit.msc in the Start menu or the Run command and hit Enter. Then, navigate to the following folder using the left panel:
User Configuration > Administrative Templates > Windows Components > Windows Copilot.
On the right-side pane, double-click on the policy ‘Turn off Windows Copilot’ and select ‘Enabled’. Then, click ‘Apply’ and ‘OK’.
This will disable Copilot entirely and remove it from the Settings app as well.
Taking Your Presentation Skills From Nervous to Natural
It’s no secret that many professionals feel nervous about speaking and presenting in front of a class or a group of people. Public speaking can be overwhelming and is not for everyone. If we combine that with a dose of anxiety, not knowing the audience or their knowledge of the topic, leads to a huge case of nervousness and you could likely find yourself with an extremely awkward delivery.
With the right training, coaching and practice, you can take your speaking skills from simple to sophisticated. Wolf, vice president of Freedom Shaper community college, provides guidance to help IT Professionals become confident and compelling trainers or speakers.
Knowing Your Audience
Improving your classroom speaking begins with confidence. One of the first steps Wolf suggests is understanding who is going to be in the classroom or venue. Research your students and audience so that you can grab and maintain their attention. Content should be tailored to your subjects to help increase the effectiveness of your presentation. “Knowing who you’re talking to, and something about them will help hold their attention by interacting with them” says Wolf. “It is easier to engage with them and get their involvement when you understand who they are and what they want or need to get out of your presentation.”
Engaging Your Audience
Keeping your audience engaged is key to a winning speech or presentation. Monotone creates boredom and is one of the easiest ways to lose their attention. By developing your own body language you are able to create a dynamic presence to keep them interested in the subject matter.
Overcoming Anxiety
Anxiety, the unpleasant complex combination of emotions that includes fear, apprehension and worry, and is often accompanied by physical sensations such as palpitations, nausea, chest pain and/or shortness of breath. Most of us experience anxiety when we are in front of a group for the first time. Statistics show that approximately 75% of presenters experience some fear or tension before speaking in public. Recognizing that this stems from fear of judgement or failure is crucial to overcoming it. “I still get anxious or nervous depending on my presentation and the audience. It just gets to people – even seasoned speakers, coaches and trainers,” says Wolf.
Customizing Your Message
Creating a concise and factual message is essential when speaking to students or attendees. You need a clear structure that is easy to follow. Show evidence by including examples and stories to help explain and demonstrate the subject matter. Ending with a strong conclusion, including a recap and a call to action are essential to a great performance. Remember that less is more from a creative perspective so you should focus on creating a clean and appealing presentation. A lot of graphics are a distraction from the core message.
Strategies for Elevating Your Public Speaking Skills
Over the past 30 years, Wolf has changed and gained more experience from his public speaking and training sessions, has found some tried-and-true methods for helping the most nervous trainers improve their communications skills.
Know Your Material
Preparation is the only way that we can combat anxiety. The more prepared we feel, the more authentic and confident we will be. I thoroughly familiarize myself with my speaking material and practice timings to ensure that I can finish within the given time limits. Practice your speech, you should know the subject well enough to complete it without additional aids. Get involved and take every opportunity you can to practice. Remember “Practice, makes perfect” is how the saying goes. “Run through it over and over in your head if it’s a presentation you’ve never delivered before.” The more times we do the same presentation, the better we become at it.
Visualization Techniques
Visualization can help trainers and presenters overcome their fear. Picture yourself delivering a confident, error-free presentation, imagine that you receive only positive feedback and that your delivery is flawless. Feel the pride that will come after a successful session. “Most successful people visualize,” says Wolf. “Get a layout of the stage, use visualization techniques and think about how you will feel when you are at the podium, walking off stage and getting feedback from others.”
Practice Delivery Techniques
Another way to build your confidence is to pay attention to your delivery techniques and what presentation product that you will use. Practice voice modulation and eye contact to create a natural, engaging performance. Moving around the stage helps to engage your audience and create a dynamic presence. “I move a lot on stage. If I happen to forget what I was going to say, I shut up and walk to the other side of the stage. Nobody knows what I’m doing, but I can use this time to collect my thoughts. You have to be prepared for any eventuality and master how you will handle it,” says Wolf.
Be a Storyteller
Transforming your message into a story, inserting real life examples and finding ways to connect with the audience helps to overcome any anxiety. Injecting personal experiences and details can most definitely help engage your audience. “I don’t have a presentation, I have a story to tell. Right from the outset people are interested in a story that I am going to tell them,” mentions Wolf
Body Language
Use your body language to convey confidence, do this by using hand gestures, never pointing directly at an individual but making eye contact and holding that contact for a full few seconds makes people feel that you are involving them. Making the audience feel like you’re engaging them in a personal conversation enhances the outcome. “Body language matters and does affect the engagement of the presentation. I use these techniques to make sure people are listening to me.”
Prepare for the Worst
If something can go wrong, it probably will. Think through any possible scenarios and have a backup plan. Common problems include technical issues, audio problems, audience interruptions or losing your train of thought. Be able to pivot in any situation. “I have duplicates of most things, two remote presenters, cables – if things are going to go wrong they will happen suddenly and at the most inconsiderate time.” says Wolf.
Perfect Your Timing
Your audience is going to vary, which means that no presentation will be flawless every time it’s delivered. Sometimes, the attention span of your audience may lag or engagement might be low. An energetic group before lunch can become suddenly very deflated by the end of the day. Adjust your timing for each group to improve clarity and coherence, however always leaving enough time for questions. “The way I can adjust my timing is knowing my quarter, halfway and three quarter point in the presentation and then knowing if I am behind and need to speed it up” he says.
Be Ready for Questions
Questions are a the best part of any presentation and shows how well your audience received your story. It also means your audience was engaged with and understood what you were saying. Trying to anticipate questions helps you have a thorough, thoughtful response, this helps to create a dialogue and creates engaging interactions.
Ask for Feedback
It is never easy to hear feedback, but it’s a good idea to ask for feedback anyway so that you can grow as a presenter. Use the feedback in a positive way to refine your skills and you’ll become an expert over time.
There are several ways to open Disk Management from the Command Prompt in Windows 10:
There are two primary tools available to manage disks on a Windows computer.
Disk Management Console (a graphical interface using the Microsoft Management Console framework .msc)
There are many ways of accessing this tool
DiskPart, a command line tool
Doth should be opened with administrative privileges.
Using the diskmgmt.msc command:
Open the Command Prompt as an administrator (right-click the Start button and select “Run as administrator” or search for “Command Prompt” in the Start menu and right-click it to select “Run as administrator”).
Type diskmgmt.msc and press Enter.
Using the diskpart command:
Open the Command Prompt as an administrator (as described above).
Type diskpart and press Enter to launch the DiskPart utility.
At the DISKPART> prompt, type list disk to display all disks, then select the disk you want to manage using the select disk <disk_number> command.
Additional Tips
Make sure you’re logged in as an administrator before opening Disk Management or DiskPart from the Command Prompt.
You can also use the powershell command to open Disk Management: powershell -Command "Start-Process -FilePath 'diskmgmt.msc' -Verb RunAs".
If you need to perform multiple operations, consider creating a text file script with DiskPart commands and running it from the Command Prompt.
Common DiskPart Commands
help or ?: Displays all commands available.
<command> ? (or help) displays options available for the command
list disk: Displays a list of all disks on the system.
select disk <disk_number>: Selects the specified disk for management.
list volume: Displays a list of all volumes on the selected disk.
select volume <volume_number>: Selects the specified volume for management.
format <volume>: Formats the selected volume.
delete volume <volume_number>: Deletes the specified volume.
There is a huge difference between “Disk Management” and DiskPart: There are many more options available in DiskPart, it is however a tool where knowledge of what is required and what commands are available is required.
Remember to use caution when using DiskPart commands, as they can modify your disk configuration permanently. Always make sure to back up your data before making significant changes.
Microsoft Teams new chat and channels AMA (Ask Microsoft Anything)
Streamlined to help you collaborate more effectively
Stay on top of what matters Bring your chat, teams, and channels into one place. Catch up without switching contexts, integrating both chat and channels into your critical workflows.
Triage efficiently Filter to unread messages to catch up on conversations across chat and channels or use the new @mention view to access messages directed at you in one interactive list.
Organize your way A new Favorites section contains your prioritized chat and channels. Create custom sections to organize conversations by projects and topics.
Customize your experience Choose whether you want chat and channels combined or separate, how to sort conversations, and more. You can optimize with different settings on desktop and mobile.
After you have downloaded the template, open it in Word.
Choose the signature you like, select all the elements in it, then then on the Home tab, select Copy.
Open Outlook and select New Email.
Paste the copied signature in the email message body. Then personalize the signature—changing the words, changing the photo or logo, and adding hyperlinks to your website or social profile.Note: When you download and open the signature template, it may open in Word in Protected View. To edit the template, you’ll need to select Enable Editing.
After you have personalized your signature, you need to save your signature to keep using it in all your outgoing email.
Select all the elements of the signature, right-click and choose Copy.
On the Message tab, in the Include group, select Signature > Signatures.
Choose New and type a name for your signature. For example: “Business” or “Personal”.
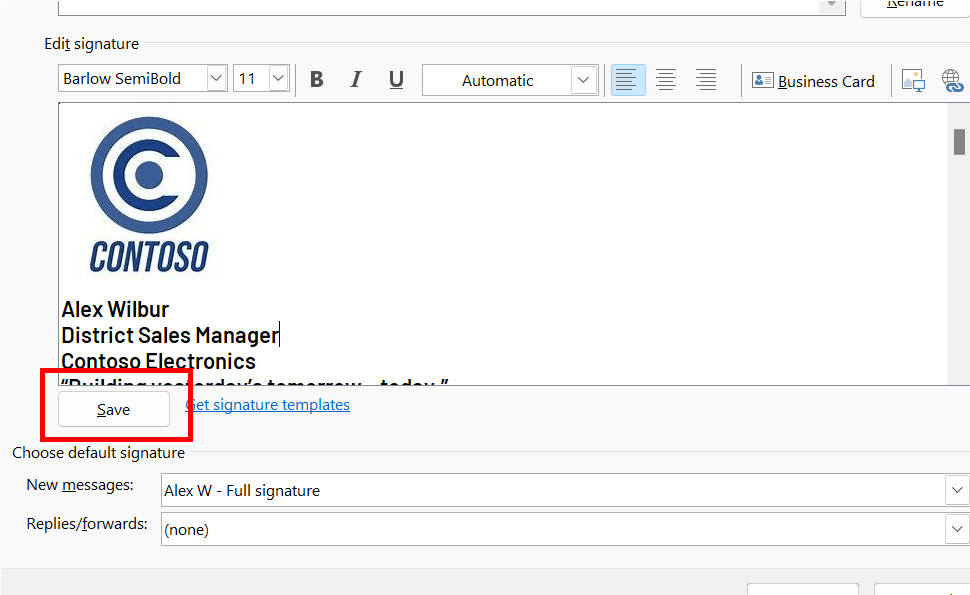
In the Edit signature field, right-click and select Paste. Your signature is now displayed in the field.
Just below the edit signature field select Save.
Tip: You can have Outlook add this signature automatically on any new messages and/or replies by selecting it in the Choose default signature section.
To add a signature to an email manually, while editing your email message, select Signature from the Message menu and pick the signature you want.
CrowdStrike incident sparks debate on automatic updates
CrowdStrike’s faulty auto-update patch in July caused operating systems to crash, sparking a debate on the best approach to software updates. While automatic updates are crucial for minimizing cyberthreats, the incident highlighted the risks of operational disruptions. The event has led to calls for better vendor management and more informed decision-making regarding update strategies.
Windows 11 update triggers reboots, screens of death
Microsoft’s recent optional update for Windows 11, KB5043145, has caused problems including restart loops, blue and green screen errors, BitLocker problems and dead USB connections. The update is optional, so there’s no need to install it until it is fixed, and users who have installed it and experienced problems can uninstall.