Chrome extensions: Edge Workspaces
Overview
Effortlessly organize and manage multiple projects or tasks by saving and restoring entire browsing sessions.
Edge Workspaces empowers Chrome users with advanced tab management: * Preserve context: Save and restore entire browsing sessions * Reduce clutter: Keep your browser organized by project or task * Improve focus: Easily switch between different work contexts * Automatic saving: Never lose your place with continuous workspace updates * Keep in sync: Your workspaces stay in sync across computers via Google sync Install Edge Workspaces to take control of your tabs and boost your productivity. Ad-free and free to use, forever!
This extension is open source. Check out the GitHub repository: https://github.com/Elec0/chrome-edge-workspaces
## How to Use ##
## Creating a Workspace ##
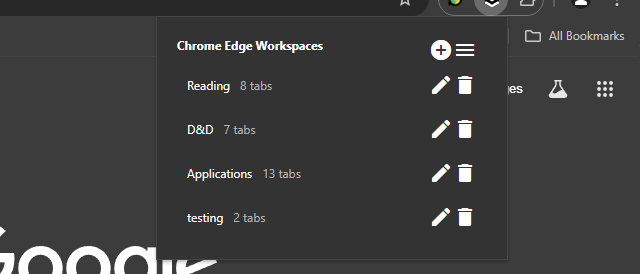
- 1. Open the extension popup by clicking the icon in the toolbar (pinning the extension is recommended).
- 2. Click the “+” icon to open the new workspace modal.
- 3. Select either “New workspace” or “New workspace from window”.
- 4. Enter a name for the workspace.
- 5. Click “OK”.
- 6. A new Chrome window will open with the New Tab page.
- 7. All tabs in the current window will be saved to the workspace as you work.
- 8. Close the window when finished.
## Opening a Workspace ##
- 1. Open the extension popup.
- 2. Click on a workspace to open it.
- 3. The saved tabs will be opened in a new Chrome window.
## Managing Workspaces ## – Click the trashcan icon to delete a workspace. – Click the pencil icon to rename a workspace.
## Saving Workspaces as Bookmarks ##
– Ensure “Save workspaces to bookmarks” option is checked in Settings. – Workspaces will now be copied to “Other bookmarks -> Edge Workspaces (read-only) -> [Workspace Name]”. – Note that changes to the bookmarks will **not** be reflected in the workspaces themselves, as they are just a copy. – When installing a new version, make sure to open old workspaces at least once to allow for them to be saved as bookmarks.
## Importing/Exporting Workspaces ##
- 1. Open the extension popup.
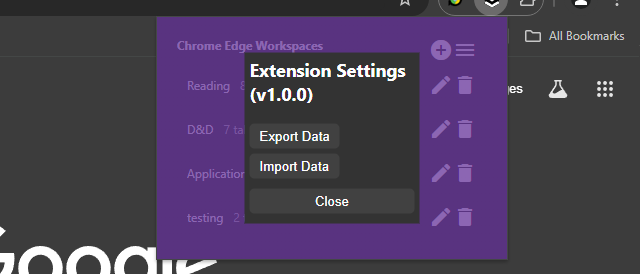
- 2. Click the hamburger icon to open the settings window.
- 3. Click “Export” to save all workspaces to a file.
- 4. Click “Import” to load workspaces from a file.
### Changelog ###
## v1.2.0 ##
– Add syncing of workspaces across computers, when signed in to Google sync
## v1.1.0 ## – Add ability to save a copy of workspaces as bookmarks


