New features gradually being rolled out to the Beta Channel with toggle on*
Making sharing files in Windows easier
Sharing files in Windows is getting a lot easier and quicker with our new drag tray feature. When you start dragging a local file with mouse (or touch) from File Explorer or your desktop, a handy tray appears at the very top of your screen allowing you to drop the file into one of the displayed apps or choose “More…” to open the Windows share window.
Changes and Improvements gradually being rolled out to the Beta Channel with toggle on*
[Start menu] 2 Versions
Microsoft is introducing two new views to the “All” page in the Start menu: grid and category view. Grid and list view shows your apps in alphabetical order and category view groups all your apps into categories, ordered by usage. This change is gradually rolling out so you may not see it right away. We plan to begin rolling this out to Windows Insiders who are receiving updates based on Windows 11, version 24H2 in the Dev and Beta Channels soon.
The first step is to select the section you want your readers to arrive at when they click the page jump. To do this, we can create what is known as an “anchor” on the block you want to jump to.
Click on the block you want to add the anchor to. Many common blocks support anchors, including Paragraph, Heading, Image, Columns, and Buttons.
View the block’s settings in the right sidebar. If you do not see the sidebar on the right, click the Settings icon in the top right corner to bring up the settings. This icon looks like a square with two uneven columns:
The settings icon in the top right corner
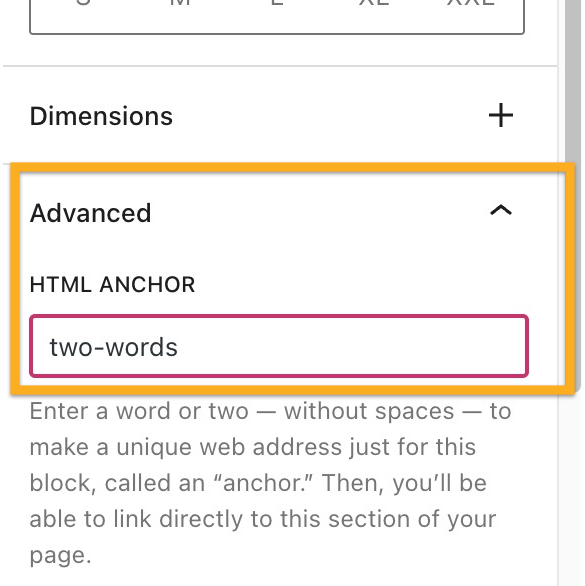
At the bottom of the block settings, click on Advanced.
Type a word in the HTML Anchor box. This will become your anchor. Be sure to use a unique word that isn’t already being used as an anchor somewhere else on the page. If you want to use more than one word, it will automatically insert a hyphen (-) between the words, like this: two-words:
Step 2: Link to Your Anchor
Next, we’re going to create the page jump link itself. Your visitors will click on this to arrive at the section you created in step 1.
Type some text, or add an image, button, or navigation menu item for your readers to click.
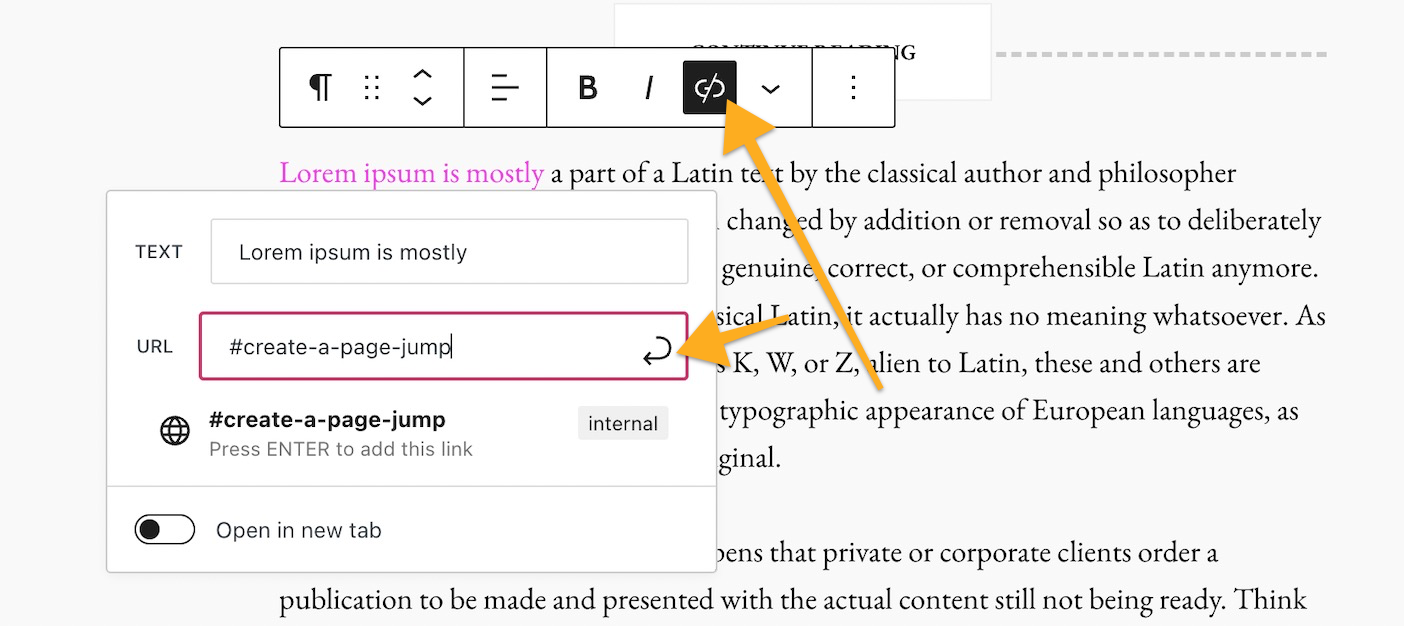
Select the text/image/button/menu item and click the link option in the block’s toolbar. The link option is an icon that looks like the actual link of a chain, as highlighted here:
Type in the HTML Anchor you created in Step 1, starting with the hashtag (#) symbol. For example, if you created an anchor named create-a-page-jump you would type your link as #create-a-page-jump
Click Save/Update/Publish in the upper right corner of the editor to save your changes.
That’s it! You can now test your link on the public page to make sure the link you created in Step 2 leads you to the anchor you created in Step 1. Note that the page jump links will not work when you preview a page or post, so test on the published version.
Page Jumps in a Navigation Menu
You can create page jumps from your navigation menu that link to a specific part of a page. This is common for sites that have a long scrolling homepage. Page jumps make it easier for visitors to view the section of the homepage they want.
The first step is to create an anchor as the spot to jump to.
In your menu, add a new item that’s a Custom Link.
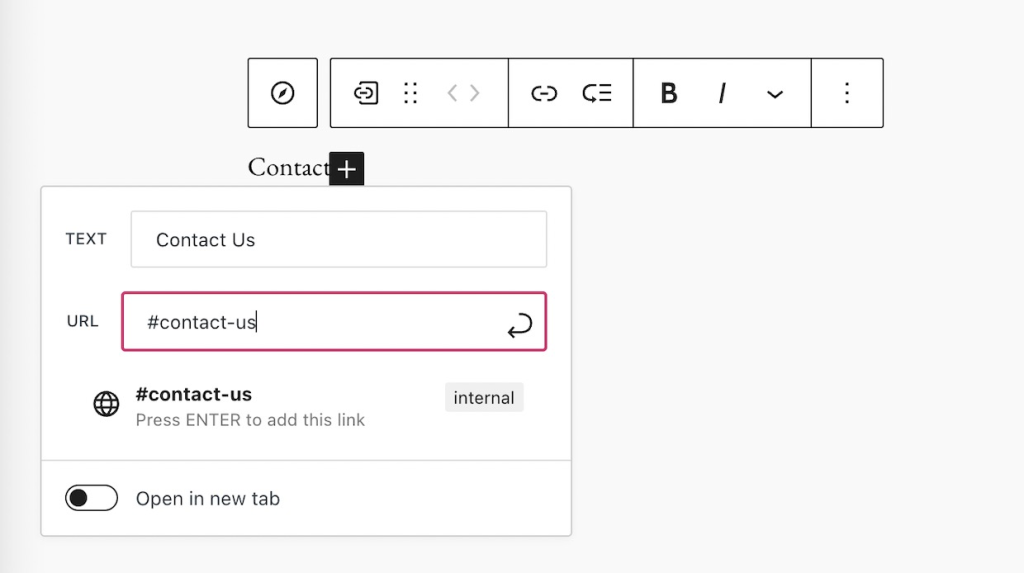
In the Text field, write whatever you would like the menu item to be called. This will not affect the page jump.
In the URL field, write your anchor with a hashtag (#) symbol in front of it as described above.
Adding a Page Jump in the menu
Keep in mind that a page jump like #my-anchor will only work on the same page that the anchor is on. If you wish to jump to a section of a different page, see the next section of this guide.
Jump to a Different Page
Page jumps don’t have to be used only for linking to sections within the same page. You can use a page jump to link from one page to a specific area on another page.
The difference is that instead of linking just to the anchor, like how we wrote our link as #create-a-page-jump in step 2 above, we would link to the full page URL plus the anchor.
For example, if your page has the following URL:
https://yourgroovydomain.com/example
and you create an anchor called unique-identifier on that page, then the full jump link would be:
Threat modeling is a core element of the Microsoft Security Development Lifecycle (SDL). It’s an engineering technique you can use to help you identify threats, attacks, vulnerabilities, and countermeasures that could affect your application. You can use threat modeling to shape your application’s design, meet your company’s security objectives, and reduce risk.
There are five major threat modeling steps:
Defining security requirements.
Creating an application diagram.
Identifying threats.
Mitigating threats.
Validating that threats have been mitigated.
Threat modeling should be part of your routine development lifecycle, enabling you to progressively refine your threat model and further reduce risk.
Microsoft Threat Modeling Tool
The Microsoft Threat Modeling Tool makes threat modeling easier for all developers through a standard notation for visualizing system components, data flows, and security boundaries. It also helps threat modelers identify classes of threats they should consider based on the structure of their software design. We designed the tool with non-security experts in mind, making threat modeling easier for all developers by providing clear guidance on creating and analyzing threat models.
The Threat Modeling Tool enables any developer or software architect to:
Communicate about the security design of their systems.
Analyze those designs for potential security issues using a proven methodology.
Suggest and manage mitigations for security issues.
The SDL Threat Modeling Tool plugs into any issue-tracking system, making the threat modeling process a part of the standard development process.
The following important links will get you started with the Threat Modeling Tool:
To start voice dictation in Windows 11, you can press the Win+H keys together to open the Voice typing tool. Alternatively, you can go to Settings > Accessibility > Speech, and turn on the switch for Windows Speech Recognition. Once enabled, you can click the microphone icon to start dictation in any application where you can type text.
This article is for people who want to control their PC and author text using their voice with Windows. This article is part of the Accessibility support for Windows content set where you can find more information on Windows accessibility features. For general help, visit Microsoft Support home.
Voice access is a feature in Windows 11 that enables everyone to control their PC and author text using only their voice and without an internet connection. For example, you can open and switch between apps, browse the web, and read and author email using your voice. For more information, go to Use voice access to control your PC & author text with your voice.
Voice access is available in Windows 11, version 22H2 and later. For more information on Windows 11 22H2 new features, and how to get the update, see What’s new in recent Windows updates. Not sure which version of Windows you have? See: Find Windows version.
Dictate punctuation marks
To insert this
Say this
.
“Period” “Full stop”
,
“Comma”
?
“Question mark”
!
“Exclamation mark” “Exclamation point”
‘s
“Apostrophe-s”
:
“Colon”
;
“Semicolon”
” “
“Open quotes” “Close quotes”
–
“Hyphen”
…
“Ellipsis” “Dot dot dot”
‘ ‘
“Begin single quote” “Open single quote” “End single quote” “Close single quote”
You may think of PowerShell as the command-line interface and scripting language on Windows, did you know that you can use it on Linux? Here’s how to take advantage of cross-platform commands and scripting
PowerShell is a command and scripting language created by Microsoft to replace the old Command Prompt. While it’s primarily associated with Windows, as part of the company’s continuing attempts to make pigs fly, they’ve made it available for Linux.
PowerShell can be used like any other shell in Linux to launch commands and to write scripts. While it has verbose commands by default, it understands common aliases like “ls” in Linux and “dir” in Windows to list a directory. It’s also object-oriented instead of relying on text streams. This makes it more complicated than the traditional Unix Philosophy solution of redirecting text input and output.
Why Install PowerShell on Linux?
The reason you might want to install PowerShell on Linux is that it gives you options. Linux already has lots of scripting languages, including the classic shells like Bash as well as more advanced languages like Perl and Python.
If you primarily use Linux but might have to administer a Windows server, you might benefit from having PowerShell installed on your Linux system. Or maybe you’re more familiar with Windows. The PowerShell command line could give you an anchor while you start exploring Linux.
Installing PowerShell
How you install Powershell will depend on what Linux distro you use.
Microsoft provides its own repositories for many popular distros, including the Red Hat Enterprise Linux Family and Debian/Ubuntu
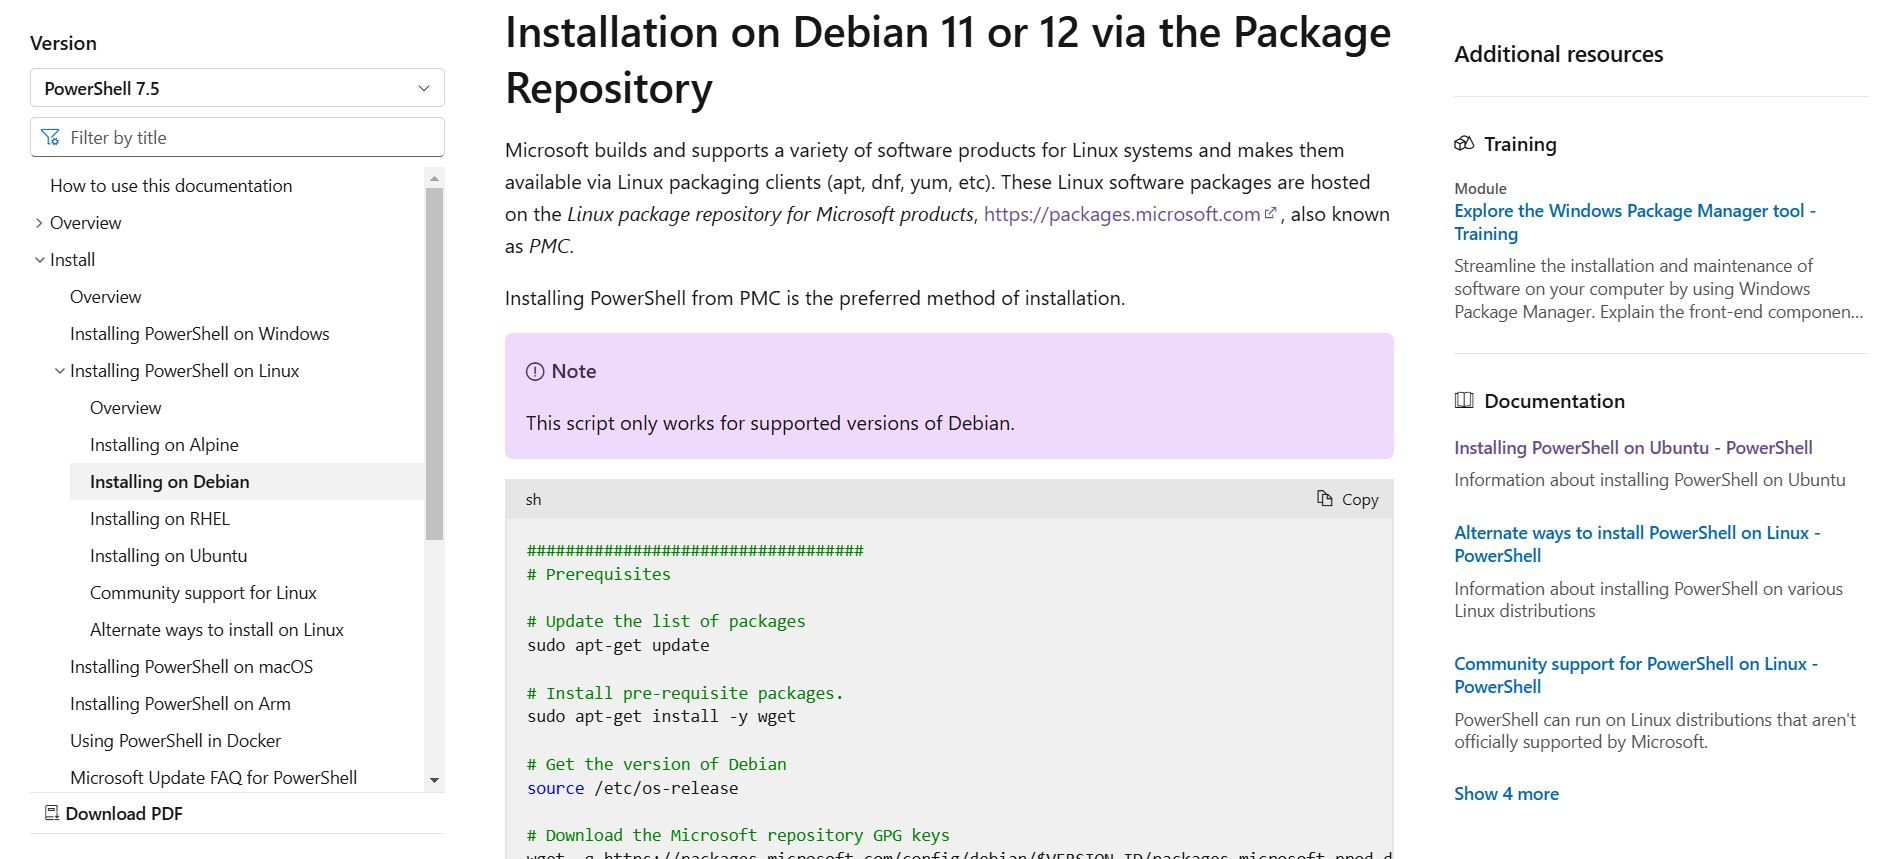
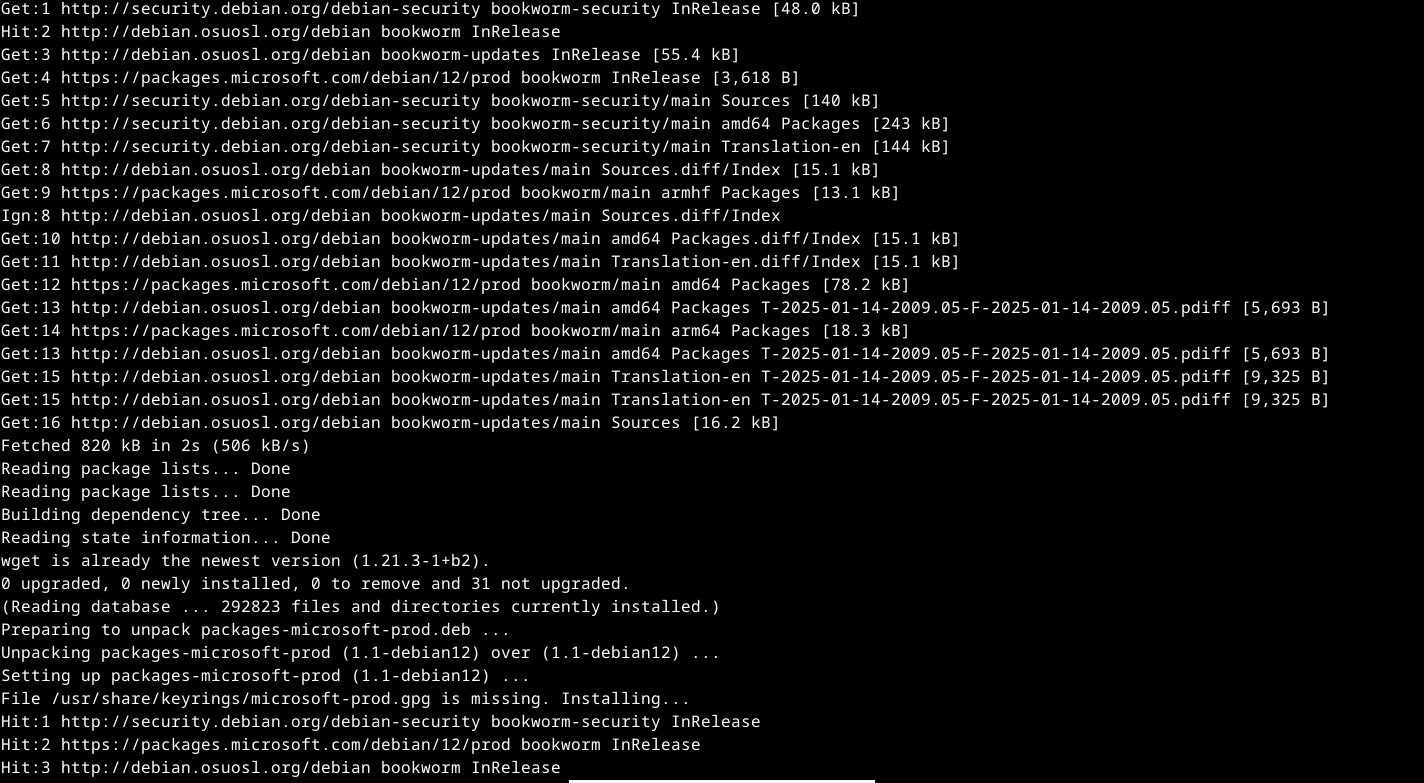
Let’s install it for Debian. Microsoft helpfully provides a script you can copy and paste. They even have a button you can click to copy it into your clipboard.
Paste the script into your terminal emulator, and it will install and run PowerShell.
Once you’ve gotten PowerShell installed you can run it. To do that, use this command:
pwsh
You’ll be using PowerShell interactively, as you would for your login shell. You can type regular commands into it.
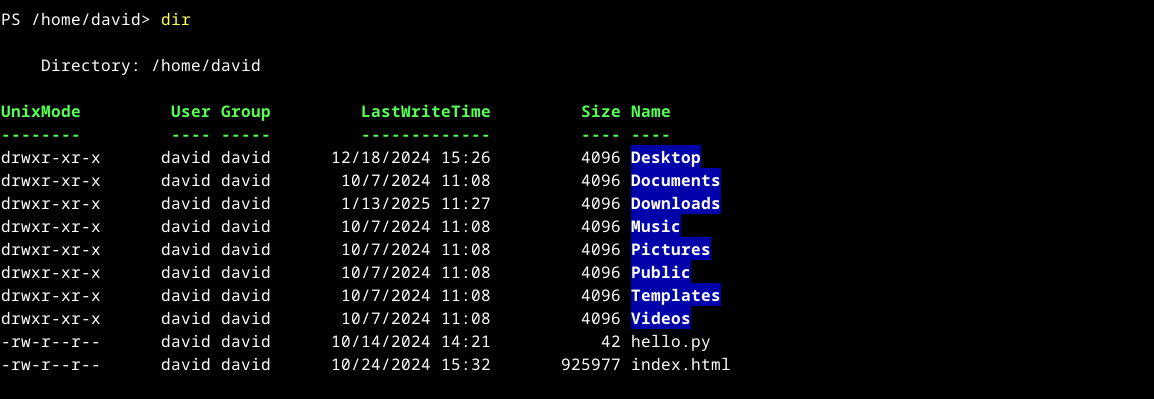
The ls command works as usual, but try using the “dir” command. You’ll see something different. You’ll see something similar to the output of the ls -l option, with the Linux permissions of the files in the left-hand column, user and group information, the last modified time, and finally the name of the files.
When you’ve finished with PowerShell, type “exit” or press Ctrl+d to end your session. If PowerShell is your login shell, this will close the window. If you’re running it from another shell, this will return you to the shell you called it from.
Changing Shells to PowerShell
If you want to change the Linux shell you use when you open a terminal window to PowerShell, it’s easy to do.
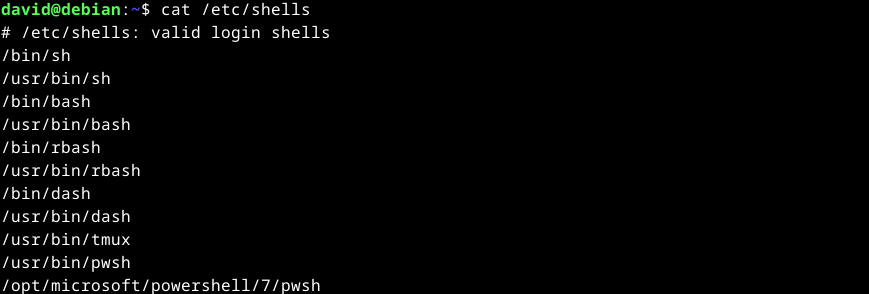
Powershell will have to be in the list of shells in the file /etc/shells. To see the list, use cat:
cat /etc/shells
You should see a line that contains “pwsh.” On this system, there are two of them: /usr/bin/pwsh and /opt/microsoft/powershell/7/pwsh. The first one seems like a better bet, since it doesn’t reference any version numbers and is less likely to break with updates.
Use the chsh command to change your login shell. You’ll need to enter your password when prompted. At the prompt, enter the pathname you want to use, in this case, /usr/bin/pwsh.
Press the Enter key and if it’s a valid shell in /etc/shells, you’ve just changed your login shell.
Log out and log back in, and start up a terminal window or virtual terminal, and you should be logged into PowerShell by default now.
If you’re writing PowerShell scripts, you can also specify Powershell by using the same paths with a shebang line. This is named because a shebang line starts with two characters: a hash (#) and an exclamation point (!), also known as a “bang.”
To call PowerShell from a script, we’ll use the same path we did earlier at the very first line in the script:
#!/usr/bin/pwsh
This should ensure that the script is run with PowerShell. You’re now ready to explore PowerShell in Linux.
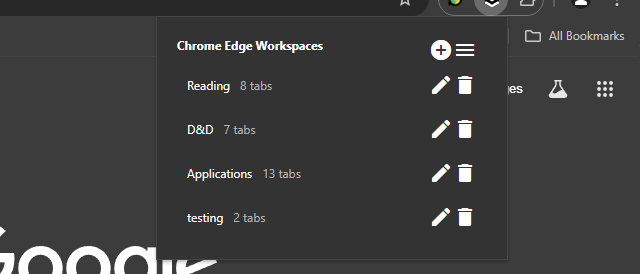
Microsoft Edge Workspaces are natively available in Microsoft Edge, but you can use a third-party extension to replicate this feature in Google Chrome. One such extension is “Edge Workspaces,” which is available on the Chrome Web Store. This extension allows you to organize and manage multiple projects or tasks by saving and restoring entire browsing sessions.
To use Edge Workspaces in Chrome:
Install the extension from the Chrome Web Store.
Open the extension popup by clicking the icon in the toolbar.
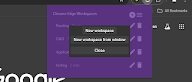
Click the “+” icon to open the new workspace modal.
Select either “New workspace” or “New workspace from window.”
A new Chrome window will open with the New Tab page.
As you work, all tabs in the current window will be saved to the workspace.
Close the window when finished.
The extension also supports managing workspaces, such as renaming or deleting them, and saving workspaces as bookmarks. However, it’s important to note that changes to the bookmarks will not be reflected in the workspaces themselves, as they are just a copy.
Effortlessly organize and manage multiple projects or tasks by saving and restoring entire browsing sessions.
Edge Workspaces empowers Chrome users with advanced tab management: * Preserve context: Save and restore entire browsing sessions * Reduce clutter: Keep your browser organized by project or task * Improve focus: Easily switch between different work contexts * Automatic saving: Never lose your place with continuous workspace updates * Keep in sync: Your workspaces stay in sync across computers via Google sync Install Edge Workspaces to take control of your tabs and boost your productivity. Ad-free and free to use, forever!
This extension is open source. Check out the GitHub repository: https://github.com/Elec0/chrome-edge-workspaces
## How to Use ##
## Creating a Workspace ##
1. Open the extension popup by clicking the icon in the toolbar (pinning the extension is recommended).
2. Click the “+” icon to open the new workspace modal.
3. Select either “New workspace” or “New workspace from window”.
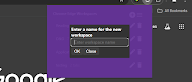
4. Enter a name for the workspace.
5. Click “OK”.
6. A new Chrome window will open with the New Tab page.
7. All tabs in the current window will be saved to the workspace as you work.
8. Close the window when finished.
## Opening a Workspace ##
1. Open the extension popup.
2. Click on a workspace to open it.
3. The saved tabs will be opened in a new Chrome window.
## Managing Workspaces ## – Click the trashcan icon to delete a workspace. – Click the pencil icon to rename a workspace.
## Saving Workspaces as Bookmarks ##
– Ensure “Save workspaces to bookmarks” option is checked in Settings. – Workspaces will now be copied to “Other bookmarks -> Edge Workspaces (read-only) -> [Workspace Name]”. – Note that changes to the bookmarks will **not** be reflected in the workspaces themselves, as they are just a copy. – When installing a new version, make sure to open old workspaces at least once to allow for them to be saved as bookmarks.
## Importing/Exporting Workspaces ##
1. Open the extension popup.
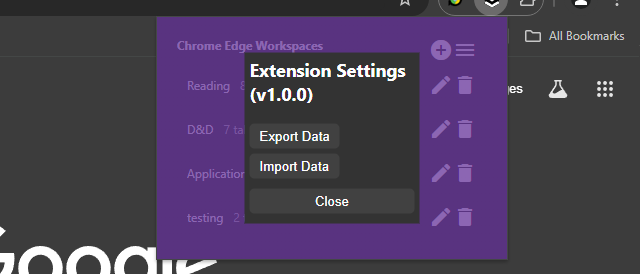
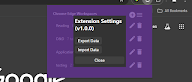
2. Click the hamburger icon to open the settings window.
3. Click “Export” to save all workspaces to a file.
4. Click “Import” to load workspaces from a file.
### Changelog ###
## v1.2.0 ##
– Add syncing of workspaces across computers, when signed in to Google sync
## v1.1.0 ## – Add ability to save a copy of workspaces as bookmarks
Determine whether the Autodiscover service is working, and check access to the Offline Address Book
Check whether Outlook and the computer can access the Offline Address Book file on the server. This action is typically done by Outlook in the background. It also happens when you force a download of the Offline Address Book in Outlook. To do this check, sign in to the Microsoft 365 portal, and then follow these steps:
Start Outlook.
Hold down the CTRL key, right-click the Outlook icon in the notification area on the right side of the taskbar, and then click Test E-mail AutoConfiguration.
Click to clear the Use Guessmart check box, and then click to clear the Secure Guessmart Authentication check box.
Click to select the Use AutoDiscover check box.
Type the email address and password, and then click Test.
On the Results tab, note the path of OAB URL.
Click the XML tab, locate the <OAUrl> and </OABUrl> tags, and then copy the path that’s displayed between the tags. Paste the path into the address box in Windows Internet Explorer, add /OAB.xml to the end of the path, and then press Enter.
The following is an example of what the URL may resemble:
If your computer becomes disjointed from a Domain, and you need to rejoin it to the domain, it will create a new profile folder with additional information in the folder name. Here is a way to change the folder name back to the original.
To rename the user profile folder in Windows 11, you’ll need to follow these steps:
Create a new administrator account: This will allow you to modify the registry and rename the user profile folder without affecting your current account.
Activate the built-in administrator account: Go to Computer Management > Local Users and Groups > Users > Activate built-in admin.
Sign out and log in to the new administrator account: This will ensure you’re using the correct account for the renaming process.
Rename the user profile folder: Go to the C:\Users\ folder and rename the subfolder with the original user name to the desired new name. Make sure to follow these guidelines:
No spaces within the new name.
Use only alphanumeric characters (letters and numbers).
Update the registry: Go to HKEY_LOCAL_MACHINE\SOFTWARE\Microsoft\Windows NT\CurrentVersion\ProfileList and update the registry entries associated with your user account to reflect the new folder name.
Restart and log in to your original account: After updating the registry, restart your computer and log in to your original account. The renamed user profile folder should now be reflected.
Important Notes:
Renaming the user profile folder can cause issues with some Microsoft Store apps. Signing out and signing back in may resolve these issues.
If you encounter problems, consider creating a new local account (without spaces in the name) and moving your files from the old account to the new one. This may be a safer and more straightforward approach.
The workaround mentioned in KB article 2454362 (applicable to Windows 7 and Server 2008 R2) is not applicable to Windows 11.
Additional Tips:
Be cautious when modifying the registry, as incorrect changes can cause system instability.
It’s recommended to create a system restore point before making changes to the registry or user profile folder.
If you’re experiencing issues with the renamed user profile folder, try resetting the folder name to its original value and then renaming it again.
By following these steps and guidelines, you should be able to successfully rename your user profile folder in Windows 11.
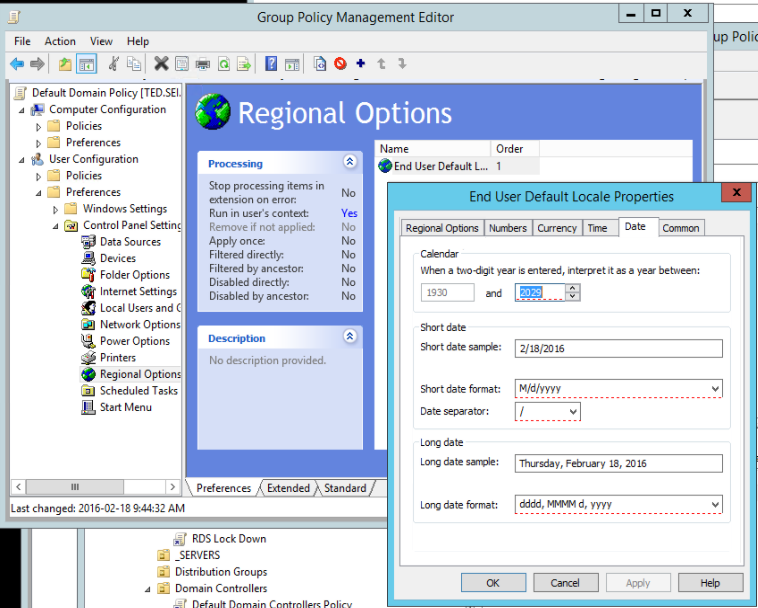
Trying to change the default Regional Settings through the Domain Group Policy Editor to apply a date format of dd-mm-yyyy instead of the default m/d/yyyy
Creating a new GPO called “RegionalSettings” and editing this GPO and saving it. Re-editing the GPO settings, we notice that they have not saved the new format but reverted back to the default.
Trying this on other policies, including the default domain controller policy, all to no avail. No changes are saved.
When changes are made we now see a red box around what was changed, in the past we would click on the apply button, but this no longer saves the changes.
Not sure at what stage this was changed, but now it seems that when changes are made we have to press (F5) before exiting out of the properties page by clicking OK.