On the “Home” Tab in the “Editing” section, click the down arrow and select either Find or Replace.
The Find or Replace Navigation will open in the left section of the document.
Type the required content to find in the search box and the results will show
If you selected Replace: The Find and Replace search box will display in a window. Fill in the Find What text in the firsts box and what you want to replace it with in the “Replace with:” dialogue box. Select either “Replace” aor “Replace All“. You will see that the R in Replace and the A in “Repalace All” is under lined so you can use those characters on the keyboard, without having to click on the buttons. If you choose “Replace” you can then click “F” to find the next instance without replacing the instance to skip some choices.
To open the “Find” or “Replace” sections use the keyboard shortcut sequence: CTL F to Find and CTL H to Replace or type “Find” or “Replace” in the Tell me what you want to do Search feature in Ribbon.
Microsoft InfoPath is now obsolte and Power Apps is the recomended Replacement.
Microsoft InfoPath a forms generator for SharePoint or desktop is being phased out and has been replaced by other Microsoft products such as SharePoint Lists, Flow, and PowerApps.
PowerApps, in particular, is highlighted as a superior replacement due to its ability to build new business applications quickly and efficiently. Microsoft announced the discontinuation of InfoPath on January 31, 2014, and PowerApps was introduced as the replacement in late 2016.
Power Apps is a suite of tools within the Microsoft Power Platform designed to help users create custom business applications without extensive coding knowledge. It includes services, connectors, and a data platform that enables rapid development of applications tailored to specific business needs.
Users can build various types of apps, such as canvas apps, model-driven apps, and cards, using Power Apps Studio, which provides a user-friendly interface similar to building a slide deck in Microsoft PowerPoint. These apps can be accessed from any device, including mobile phones and tablets, and can run offline, syncing data when a connection is re-established.
Power Apps integrates with other Microsoft services like Azure, Dynamics 365, and Teams, as well as third-party applications, allowing for seamless data connectivity and automation. It also supports custom code development and provides a low-code programming language called Power Fx, which can be used across the Power Platform.
Power Apps Studio supports a wide range of controls, including forms, buttons, date pickers, text inputs, rectangles, text boxes, and vertical galleries, among others. These controls help you create interactive and functional apps tailored to your business needs.
For those experiencing performance issues with Power Apps Studio, switching to Microsoft Edge as your browser is highly recommended, as it can significantly improve the performance and reduce lag.
Microsoft PowerApps Studio Desktop was deprecated in favor of the web studio experience. The web studio offers a more up-to-date and feature-rich environment for creating canvas apps, surpassing the capabilities of the desktop app in both features and performance. As of June 1, 2018 the desktop app’s authoring experience was deprecated.
Copilot in Excel simplifies data analysis by enabling you to search for and import data from Word, PowerPoint, PDF documents, or other Excel files into your spreadsheets. Save time and gain insights with this powerful tool.
Search and import data with Copilot in Excel
Data analysis is a critical yet challenging task for many business professionals, as creating and preparing data, then gaining insights from it and conducting advanced analyses, can be time-consuming and complex.
Copilot in Excel can help! We’re thrilled to announce that Copilot in Excel can now reference Word, Excel, PowerPoint, and PDF files, making the entire data collection and analysis process faster, simpler, and more intuitive.
This new capability works for gathering information such as:
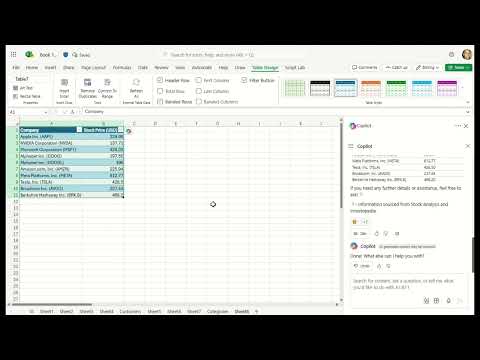
Web content: You can seamlessly search the web directly within Copilot in Excel to find public information like dates, statistics, and more without disrupting your workflow. For instance, you can look up a list of countries and their exchange rates, and easily paste these results into a table.
Internal content: For example, you can ask Copilot in Excel to list the announcements from a newsletter drafted in Word, and Copilot will respond with a list that you can insert into a new spreadsheet.
Organizational information: You can ask Copilot for all the employees who report to a specific manager and insert this list into a spreadsheet.
Data from another Excel file: One of our top user requests is toimport data from another Excel file. This is possible with Power Query, but doing so takes time and knowledge – not to mention, searching for the right file can be frustrating. Now you can ask Copilot for help finding and importing a table from an Excel file using everyday language. For example, say you want to add budget details from another Excel spreadsheet to your sales team table: You can describe the data that you need, and Copilot will help you import it. Because this import is powered by Power Query, it brings precise data directly from your organization’s data sources as a refreshable connection. As data is updated in the budget file, it also updates in your sales team table.
How it works
On the Home tab in Excel, select Copilot.
Ask Copilot a question about the data you are looking for.
Ask follow-up questions to Copilot’s responses until you’re happy with the results!
Video provider requires cookies to play the video. Accept to continue or watch it directly on the provider’s site.Accept
NOTE: For results that are from external data, make sure you see reference(s) at the end of the response.
Scenarios to try
Try prompting Copilot in Excel with:
“Search the web for an itinerary for a month-long trip to Europe in a table format.”
“Search the web for a list of 15 intermediate-level vocabulary words in Spanish and their translations.”
“Show me next week’s meetings and to-do items in a table.”
“List yesterday’s emails in a table, with sender, subject line, and importance.”
Known limitations
Importing refreshable data is only supported for Excel files with tables, stored on your SharePoint or OneDrive.
Addressing workbook data and asking for external data simultaneously is not fully supported yet.
Requirements
To use this feature, you must have:
a Copilot license (get more details on licenses for consumers and for businesses).
Paint now comes with new AI-powered tools to help you edit images like a pro and create art like a visionary. Included in the latest version of Windows 11, Paint is your new creative partner.
This is a huge update from the previous versions that was difficult to remove backgrounds, but working with layers was never possible. I am eager to try it and see how it works.
New features gradually being rolled out to the Beta Channel with toggle on*
Making sharing files in Windows easier
Sharing files in Windows is getting a lot easier and quicker with our new drag tray feature. When you start dragging a local file with mouse (or touch) from File Explorer or your desktop, a handy tray appears at the very top of your screen allowing you to drop the file into one of the displayed apps or choose “More…” to open the Windows share window.
Changes and Improvements gradually being rolled out to the Beta Channel with toggle on*
[Start menu] 2 Versions
Microsoft is introducing two new views to the “All” page in the Start menu: grid and category view. Grid and list view shows your apps in alphabetical order and category view groups all your apps into categories, ordered by usage. This change is gradually rolling out so you may not see it right away. We plan to begin rolling this out to Windows Insiders who are receiving updates based on Windows 11, version 24H2 in the Dev and Beta Channels soon.
Threat modeling is a core element of the Microsoft Security Development Lifecycle (SDL). It’s an engineering technique you can use to help you identify threats, attacks, vulnerabilities, and countermeasures that could affect your application. You can use threat modeling to shape your application’s design, meet your company’s security objectives, and reduce risk.
There are five major threat modeling steps:
Defining security requirements.
Creating an application diagram.
Identifying threats.
Mitigating threats.
Validating that threats have been mitigated.
Threat modeling should be part of your routine development lifecycle, enabling you to progressively refine your threat model and further reduce risk.
Microsoft Threat Modeling Tool
The Microsoft Threat Modeling Tool makes threat modeling easier for all developers through a standard notation for visualizing system components, data flows, and security boundaries. It also helps threat modelers identify classes of threats they should consider based on the structure of their software design. We designed the tool with non-security experts in mind, making threat modeling easier for all developers by providing clear guidance on creating and analyzing threat models.
The Threat Modeling Tool enables any developer or software architect to:
Communicate about the security design of their systems.
Analyze those designs for potential security issues using a proven methodology.
Suggest and manage mitigations for security issues.
The SDL Threat Modeling Tool plugs into any issue-tracking system, making the threat modeling process a part of the standard development process.
The following important links will get you started with the Threat Modeling Tool:
To start voice dictation in Windows 11, you can press the Win+H keys together to open the Voice typing tool. Alternatively, you can go to Settings > Accessibility > Speech, and turn on the switch for Windows Speech Recognition. Once enabled, you can click the microphone icon to start dictation in any application where you can type text.
This article is for people who want to control their PC and author text using their voice with Windows. This article is part of the Accessibility support for Windows content set where you can find more information on Windows accessibility features. For general help, visit Microsoft Support home.
Voice access is a feature in Windows 11 that enables everyone to control their PC and author text using only their voice and without an internet connection. For example, you can open and switch between apps, browse the web, and read and author email using your voice. For more information, go to Use voice access to control your PC & author text with your voice.
Voice access is available in Windows 11, version 22H2 and later. For more information on Windows 11 22H2 new features, and how to get the update, see What’s new in recent Windows updates. Not sure which version of Windows you have? See: Find Windows version.
Dictate punctuation marks
To insert this
Say this
.
“Period” “Full stop”
,
“Comma”
?
“Question mark”
!
“Exclamation mark” “Exclamation point”
‘s
“Apostrophe-s”
:
“Colon”
;
“Semicolon”
” “
“Open quotes” “Close quotes”
–
“Hyphen”
…
“Ellipsis” “Dot dot dot”
‘ ‘
“Begin single quote” “Open single quote” “End single quote” “Close single quote”
Microsoft Edge Workspaces are natively available in Microsoft Edge, but you can use a third-party extension to replicate this feature in Google Chrome. One such extension is “Edge Workspaces,” which is available on the Chrome Web Store. This extension allows you to organize and manage multiple projects or tasks by saving and restoring entire browsing sessions.
To use Edge Workspaces in Chrome:
Install the extension from the Chrome Web Store.
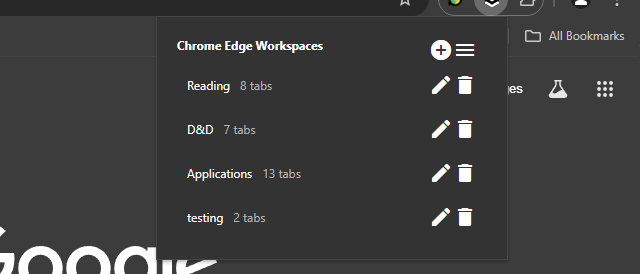
Open the extension popup by clicking the icon in the toolbar.
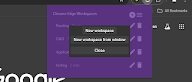
Click the “+” icon to open the new workspace modal.
Select either “New workspace” or “New workspace from window.”
A new Chrome window will open with the New Tab page.
As you work, all tabs in the current window will be saved to the workspace.
Close the window when finished.
The extension also supports managing workspaces, such as renaming or deleting them, and saving workspaces as bookmarks. However, it’s important to note that changes to the bookmarks will not be reflected in the workspaces themselves, as they are just a copy.
Effortlessly organize and manage multiple projects or tasks by saving and restoring entire browsing sessions.
Edge Workspaces empowers Chrome users with advanced tab management: * Preserve context: Save and restore entire browsing sessions * Reduce clutter: Keep your browser organized by project or task * Improve focus: Easily switch between different work contexts * Automatic saving: Never lose your place with continuous workspace updates * Keep in sync: Your workspaces stay in sync across computers via Google sync Install Edge Workspaces to take control of your tabs and boost your productivity. Ad-free and free to use, forever!
This extension is open source. Check out the GitHub repository: https://github.com/Elec0/chrome-edge-workspaces
## How to Use ##
## Creating a Workspace ##
1. Open the extension popup by clicking the icon in the toolbar (pinning the extension is recommended).
2. Click the “+” icon to open the new workspace modal.
3. Select either “New workspace” or “New workspace from window”.
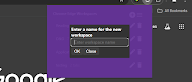
4. Enter a name for the workspace.
5. Click “OK”.
6. A new Chrome window will open with the New Tab page.
7. All tabs in the current window will be saved to the workspace as you work.
8. Close the window when finished.
## Opening a Workspace ##
1. Open the extension popup.
2. Click on a workspace to open it.
3. The saved tabs will be opened in a new Chrome window.
## Managing Workspaces ## – Click the trashcan icon to delete a workspace. – Click the pencil icon to rename a workspace.
## Saving Workspaces as Bookmarks ##
– Ensure “Save workspaces to bookmarks” option is checked in Settings. – Workspaces will now be copied to “Other bookmarks -> Edge Workspaces (read-only) -> [Workspace Name]”. – Note that changes to the bookmarks will **not** be reflected in the workspaces themselves, as they are just a copy. – When installing a new version, make sure to open old workspaces at least once to allow for them to be saved as bookmarks.
## Importing/Exporting Workspaces ##
1. Open the extension popup.
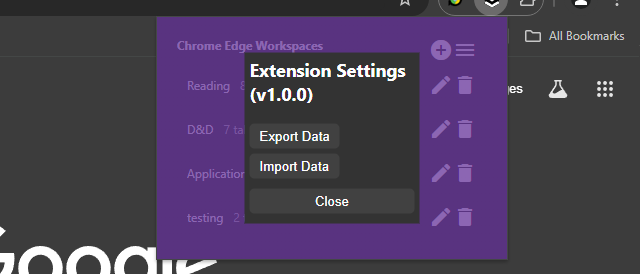
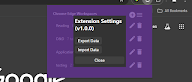
2. Click the hamburger icon to open the settings window.
3. Click “Export” to save all workspaces to a file.
4. Click “Import” to load workspaces from a file.
### Changelog ###
## v1.2.0 ##
– Add syncing of workspaces across computers, when signed in to Google sync
## v1.1.0 ## – Add ability to save a copy of workspaces as bookmarks
Determine whether the Autodiscover service is working, and check access to the Offline Address Book
Check whether Outlook and the computer can access the Offline Address Book file on the server. This action is typically done by Outlook in the background. It also happens when you force a download of the Offline Address Book in Outlook. To do this check, sign in to the Microsoft 365 portal, and then follow these steps:
Start Outlook.
Hold down the CTRL key, right-click the Outlook icon in the notification area on the right side of the taskbar, and then click Test E-mail AutoConfiguration.
Click to clear the Use Guessmart check box, and then click to clear the Secure Guessmart Authentication check box.
Click to select the Use AutoDiscover check box.
Type the email address and password, and then click Test.
On the Results tab, note the path of OAB URL.
Click the XML tab, locate the <OAUrl> and </OABUrl> tags, and then copy the path that’s displayed between the tags. Paste the path into the address box in Windows Internet Explorer, add /OAB.xml to the end of the path, and then press Enter.
The following is an example of what the URL may resemble: