
How to Rename User Profile Directory in Windows 11, 10, 8 and 7
Renaming a user account in Windows won’t automatically rename the associated user profile folder. In this tutorial we’ll show you how to manually rename user profile directory in Windows 11, 10, 8 and 7, if the name of your user account folder is not what you want.
How to Rename User Profile Directory in Windows 11, 10, 8 and 7?
To make sure your renaming of user profile folder is consistent across the entire installation of your Windows and does not break anything, follow these steps:
- Log on to another Administrator account that is not the account being renamed.
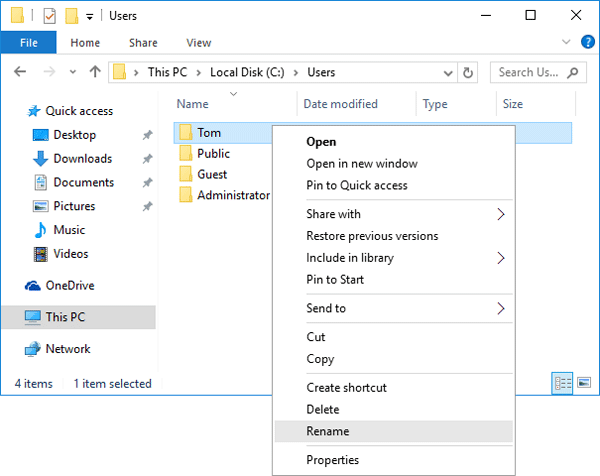
- Open the Windows Explorer and browse to the C:\Users folder. Right-click on your user account folder and rename it to whatever you like.
- Press the Windows key + R to open the Run box. Type regedit and hit Enter.
- When the Registry Editor opens, navigate to the following registry location:
HKEY_LOCAL_MACHINE\SOFTWARE\Microsoft\Windows NT\CurrentVersion\ProfileList\ - Under the ProfileList subkey you will find a few subfolders (starting with ‘S-1-5-‘) that are named with the SID of Windows user accounts. Find the SID for your user account whose profile folder you just renamed. You can simply open each subfolder and check the ProfileImagePath path for the correct one.
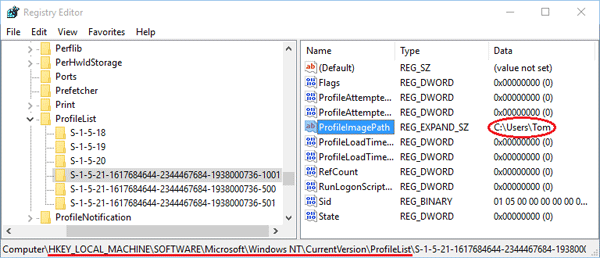
- In the right-pane, double-click the ProfileImagePath value and change the user profile path to your desired name. In my example, I renamed the account folder from C:\Users\Tom to C:\Users\Tom_New.

- Close the Registry Editor window. Logout of the Administrator account and log in with your user account. Everything should work fine – all your apps and files should be intact and your user folder should have been renamed.


 Bose (bluetooth) Soundlink Micro, I have just purchassed a new Surface Laptop 2 to replace my Surface Pro 4. The transfering of date from my old Surface Pro to the new Laptop 2 went according to plan. I was able to test most things before my next trip to Edmonton to train the final course CompTIA Security + for the 3rd intake.
 After much testing on various devices I proved that the issue was with my new Surface Laptop. How very sad, searching online for a solution I quickly realised that hundreds of people had the same issue with different hardware, something that Bose themselves had not yet been able to resolve. Realising that it could not be my Laptop, I of course couldn’t give up and revert to the Surface pro. I have just gotten used to the slightly larger screen of the Laptop 2. After many hours I found an inconspicuous post that said we had to add a registry setting. Me I had to check this first in the registry myself, and found setting was already there but needed to have its value changed from 1 to 0.