Microsoft to rid Authenticator of password management
Microsoft will end support for password management in its Authenticator app at the end of July as part of a broader move toward passwordless authentication methods such as passkeys and FIDO2. Microsoft suggests users who continue to use passwords to use dedicated password managers such as Microsoft Edge or Google Password Manager.
If you need to use the command line, you can type wt into search or right click Start and select Terminal in the menu. Holding Shift + CTRL when you press enter will launch Windows Terminal as admin.
Windows Terminal is a modern host application for the command-line shells you already love, like Command Prompt, PowerShell, and bash (via Windows Subsystem for Linux (WSL)). Its main features include multiple tabs, panes, Unicode and UTF-8 character support, a GPU accelerated text rendering engine, and the ability to create your own themes and customize text, colors, backgrounds, and shortcuts.
Microsoft shares workaround for Outlook crash issue
Microsoft has released a temporary fix for an issue that crashes the classic Outlook client when opening or starting emails, which affects users in the Monthly Enterprise Channel who updated to Version 2504. While a permanent fix is being developed, Microsoft has a workaround that involves creating a missing “FORMS2” folder.
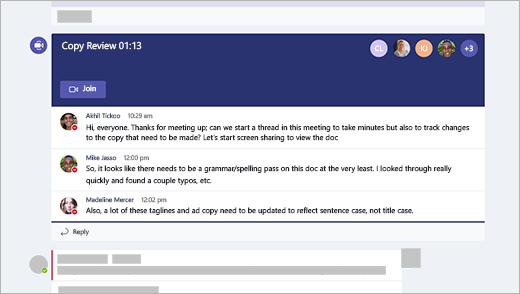
If you have a Teams account, select Sign in to join with access to the meeting chat and more. You’ll then join the meeting right away or enter the lobby until an organizer admits you.
Join a meeting organized by a Teams personal account user
Use your Teams account to attend a meeting set by a Teams personal account user. You can join from your Teams calendar. If someone sends you a meeting invite in Chat, select the link and select Join now.
In Teams, select Calendar to see your meetings.
Find the meeting you want to attend and select Join.
You’re not required to switch between Teams personal use and Teams (work or school).
If you join a meeting on Teams for personal use, you’ll join the meeting with your personal Teams account. The Microsoft Privacy Statement governs data for meetings with personal Teams accounts.
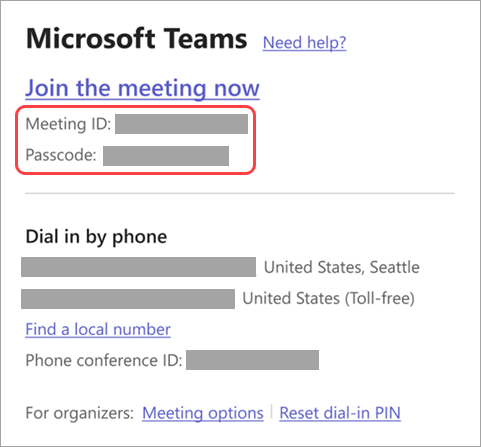
Enter a meeting ID and passcode. You can find the meeting ID and passcode:
In the meeting details from your Teams calendar. Select Details > Show meeting info.
At the bottom of your Teams meeting invite email.
3. Select Join meeting to join the meeting as a participant.
Join in a channel
If a meeting takes place in a channel, you’ll see an invitation to join, relevant content, and who’s in the meeting right in the channel. Just select Join .
Join from chat
To start or join an instant meeting from a group chat:
Open the group chat you want to start an instant meeting in.
At the top of the chat, select Meet now.
If an instant meeting starts in a group chat, you’ll be able to see see from the chat list that a meeting has started.
You can open the group chat and select Join to enter the meeting.
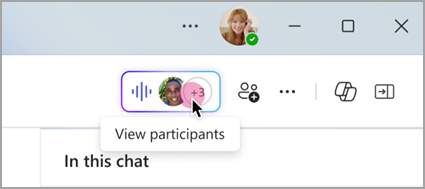
Select the live indicator at the top of the group chat to view participants.
Select Ring others to join to notify others in the group chat about the instant meeting.
Select Leave from your call window to leave the meeting.
Dial in or out to join a Teams meeting with your phone or invite someone else by calling their phone. If you see a phone number and conference ID in your meeting invite, dialing into the meeting is available. To learn more, see Join a Teams meeting by phone.
Note: If you can’t find a phone number in the meeting invite, contact your IT admin.
To dial out to your phone to join a meeting:
Select Calendar in Teams.
Select a meeting.
Select Join.
Select more join options from the pre-join screen.
Select Call me.
Enter the phone number you want to be called from and select Call me.
When you answer the call, say “OK” or press 1 to join, depending on org settings.
Hang up or select Disconnect in the meeting window to end your phone call.
To dial out to another person’s phone during a meeting:
Select People in your meeting controls.
Add their phone number in Invite someone or dial a number.
Select Add phone.
The person will be called and will need to say “OK” or press 1 to join the meeting, depending on org settings.
Join anonymously or from a different account
To join a Teams meeting with a different account:
Select the meeting in your Teams calendar.
Select Join.
Select Change at the top of the meeting pre-join screen.
Select the account you want to join the meeting with.
If you don’t see the account you want to join from, select Add another account. Then, add an existing account, or select Create or use another account to create or sign into a new one.
Select Join to enter the meeting.
To join a Teams meeting anonymously:
Select the meeting in your Teams calendar.
Select Join.
Select Change at the top of the meeting pre-join screen.
Select Join without signing in.
Type your name in at the top of the pre-join screen.
Select Join to enter the meeting.
Connect to a room while you join
Before you join a Teams meeting, you can connect to a meeting room and use its audio and video devices.
To connect to a room:
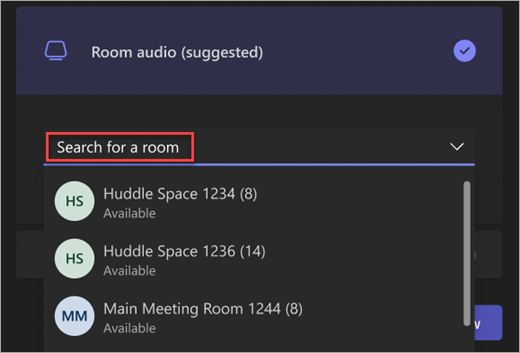
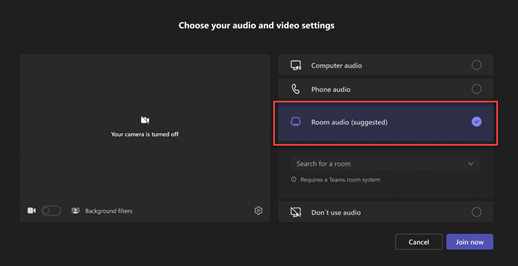
Join your meeting. Before you enter, wait for a room to be detected.Important: Enable Bluetooth on your device to detect rooms nearby.
Select Room audio and confirm the room you want to connect to.
Note: Select X to close a suggested room and search for a different one. Rooms with the Cast icon are in close proximity.
Select Join now.
Edit your display name
Note: Editing your display name is available as part of the public preview program and might undergo further changes before being released publicly. To get access to this and other upcoming features, switch to Teams public preview.
Customize your presence during a Teams meeting by editing your display name.
To change your name:
Select People in your meeting controls.
In the Participants pane, hover over your name and select More options > Edit display name.
Enter a name and select Save.
Your edited name will remain throughout the duration of the meeting.
Join a meeting as an avatar
You can join any Teams meeting as a personalized avatar by following the instructions here .
Join a meeting without an account in Microsoft Teams
You can join a Teams meeting anytime, from any device, without signing into a Teams account.
Important: For some meetings, admin settings prevent unverified people from joining the meeting. Depending on the meeting, you may have to enter a one-time passcode sent to your email or create a Teams account.DesktopMobile
Join the meeting before it starts to test your setup from the pre-join screen. From there, you can enter the meeting up to 15 minutes before its start time to troubleshoot or see how Teams works. Meeting participants and organizers will be notified when you enter the meeting.
To join a Teams meeting without signing into an account:
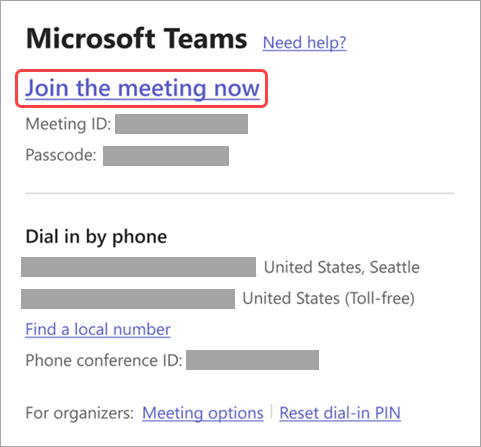
Open the meeting invite and select the link next to Join or Click here to join the meeting.
When prompted, select Continue on this browser or Join on the Teams app. You don’t need to install the Teams app to join the meeting.
You can join Teams for web on Microsoft Edge or Google Chrome. You may be prompted to give Teams access to your mic and camera. When you select Allow, you can always turn off your mic and camera once you join the meeting.
Select Join now.
In meetings where admin settings prevent unverified people from joining, you’ll be prompted to enter your email address. Enter your email address and select Next. Enter your password if you already have a Microsoft account or select Send code and enter the one-time passcode sent to your email if you don’t have an account. Once verified, select Join now.
Note: People who are signed in will have access to more meeting features than those who aren’t signed in.
If you enter the meeting lobby, wait for someone in the meeting to admit you. If no one admits you within 30 minutes, you’ll be removed from the lobby. If that happens, you can try rejoining.
Depending on how you joined the meeting, other participants will see a label next to your name. If you joined:
without entering your email address, everyone will see Unverified next to your name.
using a one-time code sent to your email, everyone will see Email verified next to your name.
with your Microsoft account, everyone will see External next to your name.
Select Admit to let them right into the meeting, or View lobby to see a list of everyone in the lobby and admit or deny them.
Note: Anyone who doesn’t have a Teams account and joins the meeting without entering a one-time passcode sent to their email will be labeled Unverified. Anyone who doesn’t have a Teams account and joins the meeting after entering a one-time passcode sent to their email will be labeled Email verified. To learn more about people with guest access, see Work with external guests.
I can’t join a meeting in Microsoft Teams
If you can’t immediately join a Teams meeting, there are several possible reasons:
You’re waiting in the lobby: Some organizers might place attendees in a lobby before admitting them into the meeting. Wait for someone to admit you, or reach out to the organizer directly to be let in.
Your internet browser isn’t supported: Teams doesn’t currently support Safari for Mac. If you’re joining a Teams meeting from the web, try joining from Microsoft Edge, Google Chrome, or other supported browsers.
Your internet connectivity is low: If your internet connection is low, you may not be able to join a Teams meeting right away. Try waiting for your connection to improve, joining from your supported mobile device, or reaching out to your internet provider.
Security policies for the meeting are preventing you from joining: If a meeting organizer enables end-to-end encryption for a meeting, you might have limited access to join. Try reaching out to the organizer to be let in.
In Teams, you might receive a message about why you’re unable to enter a meeting. Here are the different messages you might encounter and how to resolve them.
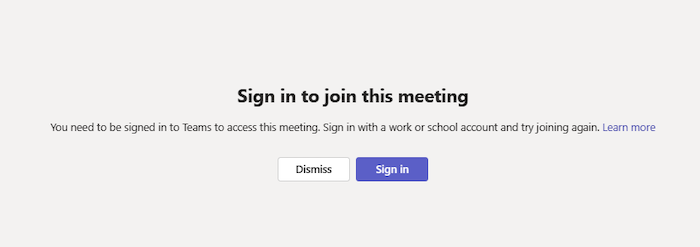
“Sign in to join this meeting”
If you see this message, the meeting doesn’t allow people to join unless they’re signed in with a Teams work or school account. You might need to take extra steps to join:
If you’re joining from a meeting link or as an anonymous user, make sure you’re signed into your Teams work or school account.
If you’re the meeting organizer and want people to be able to join your meeting without signing in, contact your IT admin (learn more here). Changes from your IT admin may take up to 24 hours to take effect.
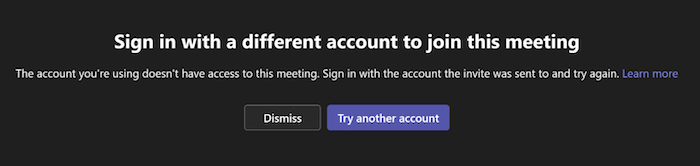
“Sign in with a different account to join this meeting”
If you see this message, the policies set by your or the meeting organizer’s org prevent you from accessing the meeting. You might need to take extra steps to join:
Make sure you’re signed into the account the invite was originally sent to.
If you’re the meeting organizer and you want to allow people from other orgs to join your meeting, contact your IT admin (learn more here). Changes from your IT admin may take up to 24 hours to take effect.
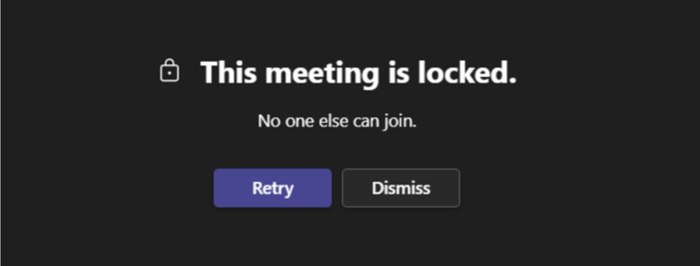
“This meeting is locked.”
After a meeting starts, organizers can lock the meeting to prevent new participants from entering.
Reach out to the meeting organizer to let them know you’re having trouble joining. If they unlock it, you can try joining again.
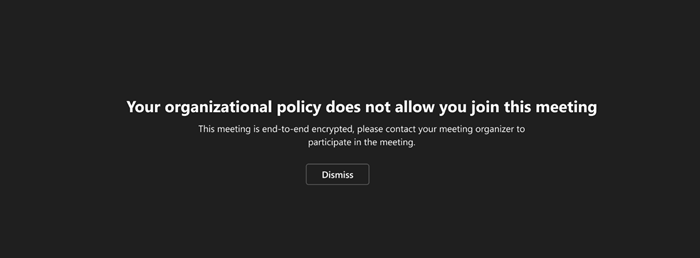
“Your organizational policy does not allow you to join this meeting”
You can’t join because the organizer has enabled end-to-end encryption for their meeting. Contact the organizer to let them know you’re having trouble joining.
“The meeting lobby is full right now.”
If the lobby is full, wait a few minutes before trying to join again. You may be able to enter if other attendees join the meeting or leave the lobby. For more on lobby settings, see Using the lobby in Teams meetings.
“Sorry, no one has responded to your request to join.”
If you get this message after 30 minutes of waiting, your request has timed out.
Check to make sure you’re joining from the correct meeting link and try again.
Reach out to the meeting organizer to make sure your request is seen.
Start an instant meeting in Microsoft Teams
If you don’t have meeting scheduling capability in Outlook or Teams, starting an instant meeting is a great option. Just like with scheduled meetings, everyone who attends your meeting will continue to have access to the meeting chat, the recording, and anything else people share in the meeting (like files and meeting notes), even after the meeting ends.
There are a couple of different ways to get an impromptu meeting going with just a few clicks.
From your calendar
Go to Calendar on the left side of Teams, then select Meet now in the upper right corner.
Edit the Meeting name and select Get a link to share to share a link to the meeting.
If you select Get a link to share, you’ll have the option to select Configure meeting options, where you can change meeting options.
When you’re ready, select Start meeting to open the meeting pre-join screen.
Select Join now to enter the meeting.
In a channel
To start an instant channel meeting:
Choose the channel you want to meet in from your chat and channels list.
In the Posts tab, look for Meet in the top-right corner.
From the drop-down menu, select Meet now.
To keep the context of a specific conversation, choose Reply below any post, then Meet now under the compose box.
Select Join now to enter the meeting.
From a group chat
Instant meetings in group chats are a way to meet with members of a chat spontaneously, without disrupting or ringing others. Group chat meetings are also a way to make sure meeting recordings and messages all stay in the same place.
To start an instant meeting from a group chat:
Open the group chat you want to start an instant meeting in.
At the top of the chat, select Meet now .
After you start an instant meeting in a group chat, others will see from their chat list that a meeting has started in that group chat.
They can open the group chat and select Join to enter the meeting.
Select the live indicator at the top of the group chat to view participants.
Select Ring others to join to notify others in the group chat about the instant meeting.
To ring individual people, select their names and select Ring.
To ring everyone who isn’t in the instant meeting, select Ring all.
Select Leave from your call window to leave the instant meeting.Note: If you’re not the last person to leave an instant meeting, you can rejoin by opening the group chat and selecting Join. When the last person leaves the meeting, everyone will be notified that the meeting has ended.
From chat using commands
Start an instant meeting in any chat using commands.
To start an instant chat meeting:
Open the chat conversation you want to start an instant meeting in.
After you join the meeting, you’ll see a prompt to invite others.
Select Copy meeting link to copy and share a link to the meeting that others can click to join.
Select Add participants to open People > Participants in the meeting, where you can search attendee names into the Invite someone or dial a number field. Hover over someone’s name and select Request to join to call them into your meeting.
Select Share via default email to launch your default email app with an automatically generated email invite. Enter recipients and send the email to invite them.
You can always add people later by selecting People in your meeting controls. Select Share invite to notify others about your meeting via link or email.
To rejoin the same meeting anytime, find the meeting chat in your chat list and select Join.
Snipping Tool now has Text Extractor in the capture bar
Microsoft is adding a Text Extractor in the Snipping tool. This feature will soon show on the capture bar and will allow you to copy text to your clipboard without having to take a screenshot of your screen. This update is currently rolling out to Windows Insiders in all channels.
The new Text Extractor
In this update, we are adding text extractor in the Snipping Tool capture bar – designed to minimize the number of steps it takes to copy text to your clipboard without having to take a screenshot of your screen.
To get started, open Snipping Tool via Win + Shift + S or launch the app and click the new “Text Extractor” button in the toolbar.
Select the region you would like to scan for text (just as you would for standard rectangle snip), and you will be able to manually select the text to copy to clipboard, or you can click on the “Copy all text” button in the toolbar to quickly copy all text in the region. You can also explore the “More options” dropdown menu to “Remove line breaks” from copied text or simplify the experience entirely with the “Automatically copy text” selection, which will dismiss Snipping Tool earlier and automatically copy all text in your selection region directly to your clipboard.
Important: For some meetings, admin settings prevent unverified people from joining the meeting. Depending on the meeting, you may have to enter a one-time passcode sent to your email or create a Teams account.DesktopMobile
Join the meeting before it starts to test your setup from the pre-join screen. From there, you can enter the meeting up to 15 minutes before its start time to troubleshoot or see how Teams works. Meeting participants and organizers will be notified when you enter the meeting.
To join a Teams meeting without signing into an account:
Open the meeting invite and select the link next to Join or Click here to join the meeting.
When prompted, select Continue on this browser or Join on the Teams app. You don’t need to install the Teams app to join the meeting.
You can join Teams for web on Microsoft Edge or Google Chrome. You may be prompted to give Teams access to your mic and camera. When you select Allow, you can always turn off your mic and camera once you join the meeting.
Select Join now.
In meetings where admin settings prevent unverified people from joining, you’ll be prompted to enter your email address. Enter your email address and select Next. Enter your password if you already have a Microsoft account or select Send code and enter the one-time passcode sent to your email if you don’t have an account. Once verified, select Join now.
Note: People who are signed in will have access to more meeting features than those who aren’t signed in.
If you enter the meeting lobby, wait for someone in the meeting to admit you. If no one admits you within 30 minutes, you’ll be removed from the lobby. If that happens, you can try rejoining.
Depending on how you joined the meeting, other participants will see a label next to your name. If you joined:
without entering your email address, everyone will see Unverified next to your name.
using a one-time code sent to your email, everyone will see Email verified next to your name.
with your Microsoft account, everyone will see External next to your name.
Select Admit to let them right into the meeting, or View lobby to see a list of everyone in the lobby and admit or deny them.
Note: Anyone who doesn’t have a Teams account and joins the meeting without entering a one-time passcode sent to their email will be labeled Unverified. Anyone who doesn’t have a Teams account and joins the meeting after entering a one-time passcode sent to their email will be labeled Email verified. To learn more about people with guest access, see Work with external guests.
I can’t join a meeting in Microsoft Teams
If you can’t immediately join a Teams meeting, there are several possible reasons:
You’re waiting in the lobby: Some organizers might place attendees in a lobby before admitting them into the meeting. Wait for someone to admit you, or reach out to the organizer directly to be let in.
Your internet browser isn’t supported: Teams doesn’t currently support Safari for Mac. If you’re joining a Teams meeting from the web, try joining from Microsoft Edge, Google Chrome, or other supported browsers.
Your internet connectivity is low: If your internet connection is low, you may not be able to join a Teams meeting right away. Try waiting for your connection to improve, joining from your supported mobile device, or reaching out to your internet provider.
Security policies for the meeting are preventing you from joining: If a meeting organizer enables end-to-end encryption for a meeting, you might have limited access to join. Try reaching out to the organizer to be let in.
In Teams, you might receive a message about why you’re unable to enter a meeting. Here are the different messages you might encounter and how to resolve them.
“Sign in to join this meeting”
If you see this message, the meeting doesn’t allow people to join unless they’re signed in with a Teams work or school account. You might need to take extra steps to join:
If you’re joining from a meeting link or as an anonymous user, make sure you’re signed into your Teams work or school account.
If you’re the meeting organizer and want people to be able to join your meeting without signing in, contact your IT admin (learn more here). Changes from your IT admin may take up to 24 hours to take effect.
“Sign in with a different account to join this meeting”
If you see this message, the policies set by your or the meeting organizer’s org prevent you from accessing the meeting. You might need to take extra steps to join:
Make sure you’re signed into the account the invite was originally sent to.
If you’re the meeting organizer and you want to allow people from other orgs to join your meeting, contact your IT admin (learn more here). Changes from your IT admin may take up to 24 hours to take effect.
“This meeting is locked.”
After a meeting starts, organizers can lock the meeting to prevent new participants from entering.
Reach out to the meeting organizer to let them know you’re having trouble joining. If they unlock it, you can try joining again.
“Your organizational policy does not allow you to join this meeting”
You can’t join because the organizer has enabled end-to-end encryption for their meeting. Contact the organizer to let them know you’re having trouble joining.
“The meeting lobby is full right now.”
If the lobby is full, wait a few minutes before trying to join again. You may be able to enter if other attendees join the meeting or leave the lobby. For more on lobby settings, see Using the lobby in Teams meetings.
“Sorry, no one has responded to your request to join.”
If you get this message after 30 minutes of waiting, your request has timed out.
Check to make sure you’re joining from the correct meeting link and try again.
Reach out to the meeting organizer to make sure your request is seen.
Using the lobby in Microsoft Teams meetings
Use the meeting lobby in Teams meetings to keep people from directly entering a meeting when they join. Organizers, co-organizers, and presenters will be notified when people enter the lobby and can let them into the meeting.
Each meeting defaults to the lobby settings set by your IT admin but you can change them before or during the meeting. You might not be able to change some settings if your meeting uses a template or sensitivity label.
Choose who can bypass the lobby
As the meeting organizer, you get to decide who gets into your meetings directly, and who should wait for someone to let them in.
If you choose to have people wait, you (and anyone else allowed to admit people) will see a list of people in the lobby. From there you can choose whether to admit or deny them.
Who can bypass the lobby?
What happens
Recommended when…
Only organizers and co-organizers
As the meeting organizer, you and any co-organizers can get into the meeting directly. Everyone else will wait in the lobby.
You want everyone else to wait in the lobby until you’re ready to admit them.
People who were invited*
Anyone who receives the invitation, including those to whom it is forwarded, will join the meeting directly.People without a Teams account won’t bypass the lobby. Additionally, distribution lists up to 10,000 users are supported. If you don’t want people to forward the invite to others, turn off Allow Forwarding in the invitation.
You want a specific, limited group of people who were invited via their Teams accounts to join the meeting directly, and everyone else to wait in the lobby.
People in my org
Only people within your org can get into your meeting directly. Everyone else will wait in the lobby.
You want all guests and external people to wait in the lobby so you can approve them one by one.
People in my org and guests
People in your org and people with guest access can get into your meeting directly.
You want all external people (anyone outside your org, except guests) to wait in the lobby so you can approve them one by one.
People in my org, trusted orgs, and guests
Anyone from your organization and organizations with which your IT admin has set up a connection, or anyone joining as a guest, will be able to bypass the lobby.
You want some external people (e.g., people joining without a Teams account and people from organizations with which your IT admin did not set up a connection) to wait in the lobby so you can approve them one by one.
Everyone
Anyone who has access to the meeting link gets into the meeting directly, including people who call in.Depending on the meeting policy set up by your IT admin, people joining without a Teams account,people from untrusted organizations, and people dialing in may be placed in the lobby until someone from your organization or a trusted organization joins the meeting, even if the Everyone option is selected.
You don’t want anyone to wait in the lobby. You want everyone to be able to join your meetings without specific approval.
* For channel meetings, only those channel members who are directly invited can bypass the lobby.
Change lobby settings
You can change lobby settings before, during, or after a meeting (in the case of a meeting series). The changes will only apply to the meeting you change them in unless the meeting is part of a series. Then, changes will be applied to all future meetings in that series. To change default lobby settings, contact your IT admin.
Before a meeting
Before a meeting
New calendar
To change lobby settings before a meeting:
Select Calendar in Teams.
Double-click an event.
Select Edit.
If you double-clicked an instance of a meeting series, select whether you want to edit This event, This and all following events, or All events in the series.
Select Meeting options.
In Meeting access:
Choose an option from the Who can bypass the lobby? dropdown menu.
Turn the People dialing in can bypass the lobby toggle on or off.
Choose who can let people into the meeting from the Who can admit from the lobby dropdown menu.
If you change lobby settings during a meeting, people waiting in the lobby will still be there.
Select Save.
Select More actions > Settings > Meeting options in your meeting controls.
In Security:
Choose an option from the Who can bypass the lobby? dropdown menu.
Turn the People dialing in can bypass the lobby toggle on or off, if available.
Choose who can let people into the meeting from the Who can admit from the lobby dropdown menu.
Manage the lobby
During a meeting, people you designated to manage the lobby can admit or deny entrance to the meeting.
Who can manage the lobby
The meeting organizer, co-organizer(s), and presenter(s) can manage the lobby. If you’re the organizer, choose which of those roles can manage the lobby during that specific meeting. You can also make someone a co-organizer or presenter by changing their meeting role.
To change who can manage the lobby:
Select Calendar in Teams.
Double-click an event.
Select Edit.
If you double-clicked an instance of a meeting series, select whether you want to edit This event, This and all following events, or All events in the series.
Select Meeting options.
In Meeting access, choose who can let people into the meeting from the Who can admit from the lobby dropdown menu.
Select Save.
To learn more about the new Teams calendar, see Get started with the new calendar in Microsoft Teams.
Admit or deny participants
During the meeting, people managing the lobby can see a list of participants waiting to get into the meeting and choose whether to admit or deny them.
To admit or deny participants:
Select People in your meeting window.
Under Waiting in the lobby:
Select the check mark next to someone’s name to admit them.
Select the X next to someone’s name to deny them.
Select Admit all to let everyone in from the lobby.
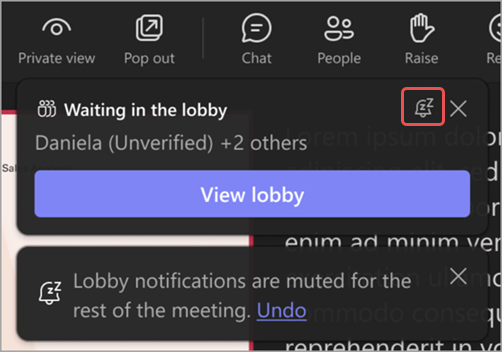
People managing the lobby will receive notifications that people are waiting in the lobby. In the notifications, select View lobby to go right to the lobby or Mute these notifications to turn the notifications off.
Select Undo to turn the notifications back on.
Turn off the lobby for a meeting
If you want everyone to join your meeting directly, set Who can bypass the lobby? to Everyone. This change will apply to that meeting and future meetings if it’s part of a meeting series. Contact your IT admin if you want to change this setting for all the future meetings you organize.
Note: If anonymous participants join first, they’ll wait in the lobby. They’ll be let into the meeting automatically after someone from your org, a trusted org, or a guest user joins. Contact your IT admin to allow anonymous participants to start meetings.
You can also remove people or lock your meeting.
To remove people from the meeting:
Select People in your meeting window.
Hover over the name of the person you want to remove.
Select More options > Remove from meeting.
Applies To
Try it!
Guests have similar capabilities to team members and can participate in meetings, chats, and work on documents.
In a team, select More options>Add member.
Enter the guest’s email. You can add as many guests as you need.
If needed, it’s best to change their display name now.
When ready, select Add and guests will be sent an email invitation they need to accept to begin.
A guest will have the label “Guest” attached to their name in Microsoft Teams. You can also check the top of any channel to see how many guests are in it.
To share files, use the Files tab and folders since document links may not work with guests.
Note: Before guests can join a team, an admin must enable guest access in Teams. If you can’t add a guest, check with your admin.
Get the most out of OneNote with these little-known features
Hi, Microsoft 365 Insiders! I’m Gokul Subramaniam, and I’m a Product Manager on the OneNote team. If you’re a OneNote fan, you’re aware of the many ways it can streamline and boost note-taking and content generation. But even the most experienced OneNote users among us might not be benefitting from all it has to offer, which is why we’ve singled out some of our favorite features that you may not be aware of – or wish existed but didn’t know they already did. Check them out, supercharge your productivity, and let us know what you think!
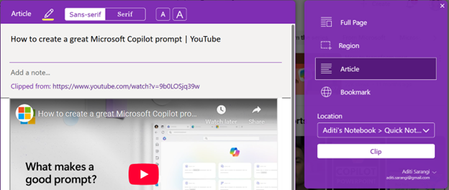
Clip web content with Web Clipper
With OneNote Web Clipper, you can easily capture and save online materials directly into your OneNote notebooks, saving you time manually copying information and allowing you to preserve the content in its original form. By simply adding the OneNote Web Clipper extension to your preferred browser, you can instantly begin clipping articles, recipes, YouTube videos, or other types of web pages, and neatly organize them into your notes for reference later.
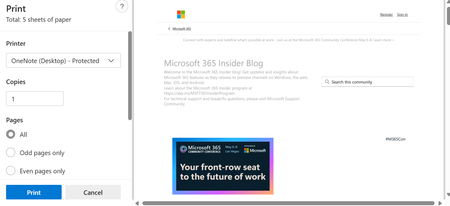
Save and showcase files with print to OneNote
The print to OneNote feature enables you to send any type of file, including documents, spreadsheets, emails, drawings or diagrams, web pages, and PDFs, directly to a OneNote notebook as a printout. This can be particularly useful for students saving lecture notes, professionals archiving important reports or correspondences, and anyone else wanting to keep a digital copy of physical documents for easy access and annotation. Simply select Print on the file, and then choose OneNote (Desktop) or OneNote (Desktop) – Protected in the Printer list to add it as an image in your chosen notebook or page.
Availability: This feature is only available to OneNote on Windows users.
Recover lost or important edits with version history
Made a mistake or written over crucial content in OneNote? You can restore previous versions of your notes, ensuring that all important information is not lost for good. Perhaps most crucially, this feature gives you peace of mind that should someone else have access to your notebook and make edits, you can still go back to earlier versions if you don’t like what they’ve added. Try it out the next time you want to track progress on a school essay, or revisit old versions of a work project, or revert back to an earlier draft. Under History, you can locate a version of your notebook based on timeframe or author, view all previous page versions, and delete certain versions you no longer need.
Availability: This feature is only available to OneNote on Windows, OneNote for Mac, and OneNote for the web users.
Store and revert deleted information with Recycle Bin
The Recycle Bin in OneNote is a feature that temporarily stores deleted notes and sections, allowing users to recover content that’s valuable or has been accidentally removed. Items in the Recycle Bin can be restored to a specific location in your notebook or permanently deleted, providing an additional layer of security against unintentional data loss. For instance, you can bring back mistakenly deleted project plans, or pull out discarded meeting notes, from the last 60 days.
Availability: This feature is only available to OneNote on Windows, OneNote for Mac, and OneNote for the web users.
New features gradually being rolled out to the Beta Channel with toggle on*
Introducing quick machine recovery
Quick machine recovery (QMR), part of the Windows Resiliency Initiative announced at Ignite 2024 is now available in the latest Windows Insider Preview build. This feature, when enabled, addresses widespread boot issues on Windows 11 devices by automatically detecting and applying fixes directly from the Windows Recovery Environment (WinRE) thereby reducing the system downtime and manual intervention. When a critical boot failure occurs, the device enters WinRE, connects to the network, and sends diagnostic data to Microsoft, which can then deploy targeted remediations via Windows Update. IT admins are encouraged to enable, customize, or test this feature, which is enabled by default for home users. Windows Insiders can start testing it today and provide feedback via Feedback Hub to refine the feature further. In the Feedback Hub app on your Windows device, select Recovery and Uninstall > Quick Machine Recovery. Keep an eye out for a test remediation package coming your way in the next few days, allowing you to experience the quick machine recovery in action.
On the “Home” Tab in the “Editing” section, click the down arrow and select either Find or Replace.
The Find or Replace Navigation will open in the left section of the document.
Type the required content to find in the search box and the results will show
If you selected Replace: The Find and Replace search box will display in a window. Fill in the Find What text in the firsts box and what you want to replace it with in the “Replace with:” dialogue box. Select either “Replace” aor “Replace All“. You will see that the R in Replace and the A in “Repalace All” is under lined so you can use those characters on the keyboard, without having to click on the buttons. If you choose “Replace” you can then click “F” to find the next instance without replacing the instance to skip some choices.
To open the “Find” or “Replace” sections use the keyboard shortcut sequence: CTL F to Find and CTL H to Replace or type “Find” or “Replace” in the Tell me what you want to do Search feature in Ribbon.
Microsoft InfoPath is now obsolte and Power Apps is the recomended Replacement.
Microsoft InfoPath a forms generator for SharePoint or desktop is being phased out and has been replaced by other Microsoft products such as SharePoint Lists, Flow, and PowerApps.
PowerApps, in particular, is highlighted as a superior replacement due to its ability to build new business applications quickly and efficiently. Microsoft announced the discontinuation of InfoPath on January 31, 2014, and PowerApps was introduced as the replacement in late 2016.
Power Apps is a suite of tools within the Microsoft Power Platform designed to help users create custom business applications without extensive coding knowledge. It includes services, connectors, and a data platform that enables rapid development of applications tailored to specific business needs.
Users can build various types of apps, such as canvas apps, model-driven apps, and cards, using Power Apps Studio, which provides a user-friendly interface similar to building a slide deck in Microsoft PowerPoint. These apps can be accessed from any device, including mobile phones and tablets, and can run offline, syncing data when a connection is re-established.
Power Apps integrates with other Microsoft services like Azure, Dynamics 365, and Teams, as well as third-party applications, allowing for seamless data connectivity and automation. It also supports custom code development and provides a low-code programming language called Power Fx, which can be used across the Power Platform.
Power Apps Studio supports a wide range of controls, including forms, buttons, date pickers, text inputs, rectangles, text boxes, and vertical galleries, among others. These controls help you create interactive and functional apps tailored to your business needs.
For those experiencing performance issues with Power Apps Studio, switching to Microsoft Edge as your browser is highly recommended, as it can significantly improve the performance and reduce lag.
Microsoft PowerApps Studio Desktop was deprecated in favor of the web studio experience. The web studio offers a more up-to-date and feature-rich environment for creating canvas apps, surpassing the capabilities of the desktop app in both features and performance. As of June 1, 2018 the desktop app’s authoring experience was deprecated.


 Note: Select X to close a suggested room and search for a different one. Rooms with the Cast icon